Identify, Track, Pay, and Report Payments to MSME Businesses
In this topic we will learn about the challenges faced by the MSME businesses due to the lack of visibility of their MSME status. We will also look into the provisions made by the Government to support such businesses and how the use of TallyPrime will improve the visibility in their business transactions and accelerate the movement of funds.
Micro and small businesses registered under the MSMED Act, 2006, get benefits such as loans at a lower interest, payment guarantees from buyers, and so on. The payment guarantee provision protects these businesses from delays in payment from their buyers. As per this act, any buyer of goods or services from registered MSMEs must make the payment on or before the agreed date or within 45 days. In case of a delay in payment beyond the specified date, buyers must pay interest on the amount. Generally in such cases, the interest rate is three times more than the rate that is notified by the Reserve Bank of India.
Additionally, the Ministry of Corporate Affairs (MCA) has notified that companies having outstanding dues to the MSME (Micro & Small) enterprises have to file the details of all the current outstanding dues to MSMEs in MSME Form-1 with the ROC (Registrar of Companies).
Despite all these facilities, the micro and small businesses are not fully benefitting from the provisions in the MSMED Act. This is primarily due to the absence of an identification for MSME Suppliers, which allows the buyers to omit/miss the MSME status of the supplier in their annual statement of accounts. As a result, the auditors do not detect such omissions because of the non-availability of any identification for MSME status.
The MSMEs should mention/print their MSME status on their invoices, bills and other relevant documents. The visibility provided to buyers and their accountants will help in the release of the payments on time and it will be also easy to file for compensation in case of delay in payments.
TallyPrime with its MSME feature will play this role of increasing the visibility of MSME status.
- MSME Enterprises will be able to update their UDYAM Registration details and print the same in business documents.
- Buyers from MSME can update UDYAM Registration details in ledgers and filter bill payables for MSMEs to ensure timely payment. They can also readily get details for MSME Form 1 for all overdues to MSME suppliers.
Buyers Update MSME Party’s UDYAM Details in Ledgers
The businesses purchasing goods and services from MSMEs can set up the status of the supplier as MSME. This sets reminders to make payments on time to all such parties and avoid paying interest for late payments. This also enables you to create and file returns quickly with all the details of payments to MSMEs.
Set/Update MSME UDYAM details for a Single Party
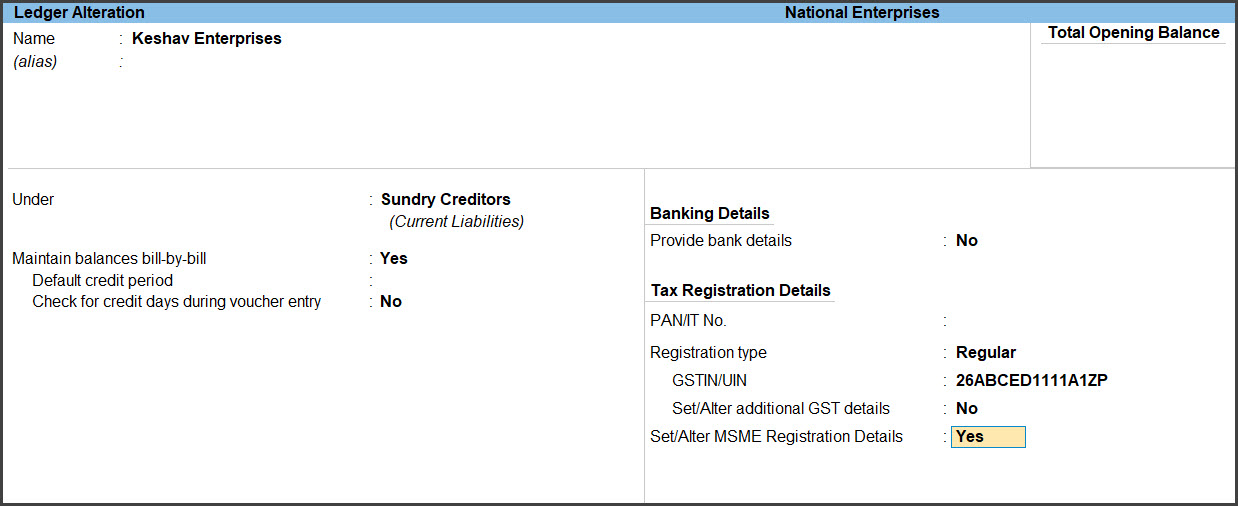
You can update the UDYAM details of MSME suppliers in the ledger master.
- Press Alt+G (Go To) > Create Master or Alter Master > Ledger.
- Enter basic party details like Name, Group, Address, if you are creating a new ledger.
- Press F12 (Configure).
- Set the option Provide MSME Registration Details to Yes.

- Press Ctrl+A to save the configuration.
- Set the option Provide MSME Registration Details to Yes.
- Enable Set/Alter MSME Registration Details.
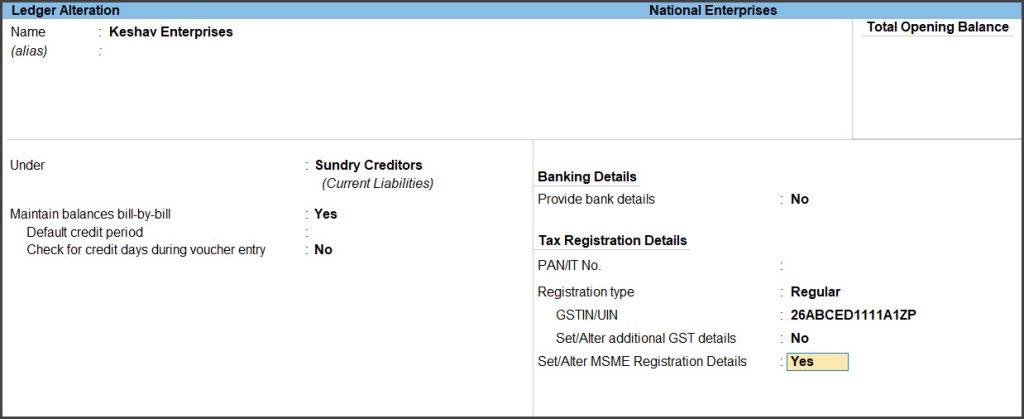
- Press Enter.
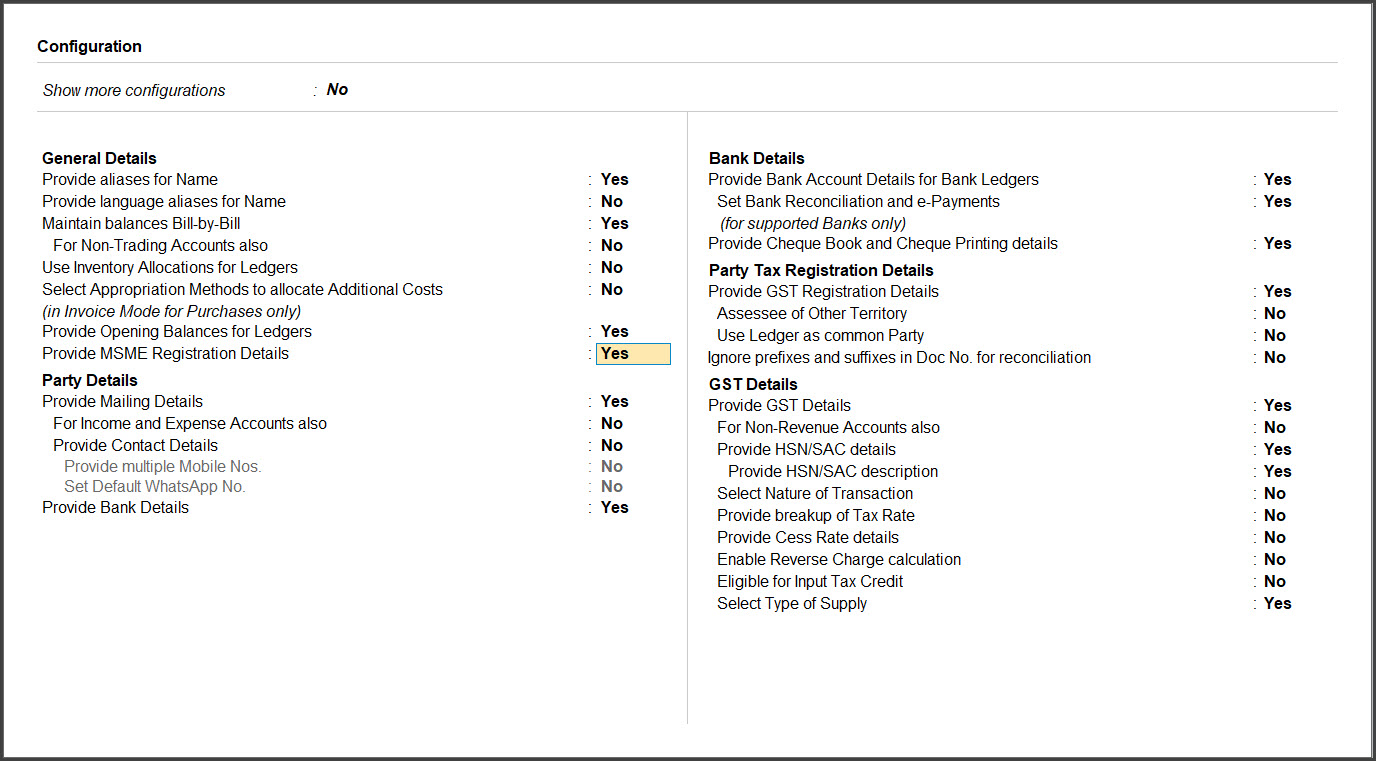
In the MSME Registration Details screen- Select the enterprise type of the party in the Type of Enterprise field.
- Enter their UDYAM Registration Number.

- Press Enter.
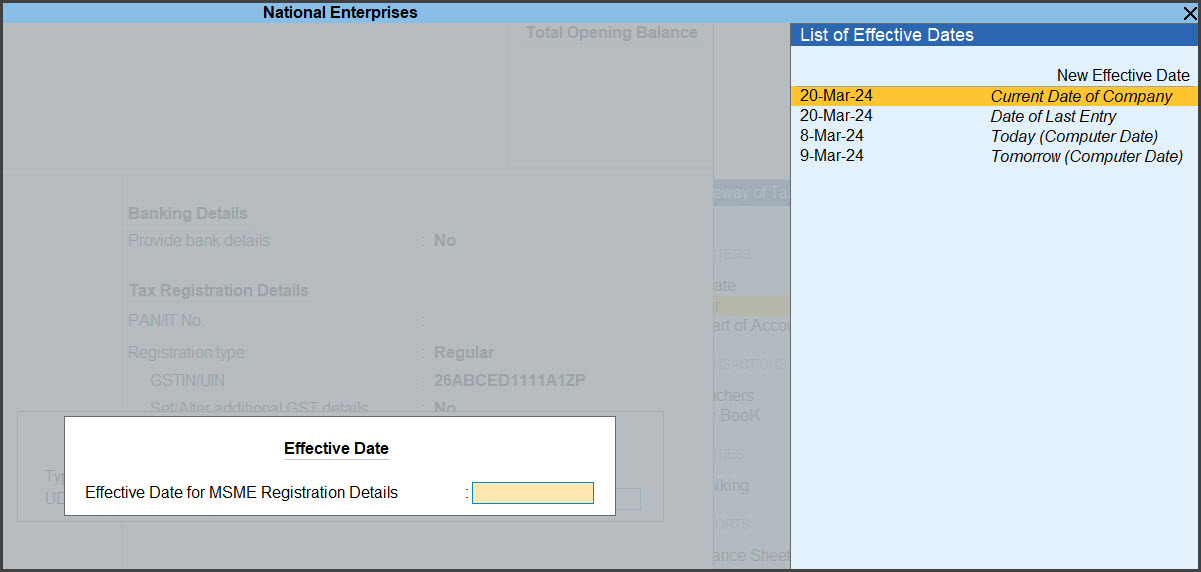
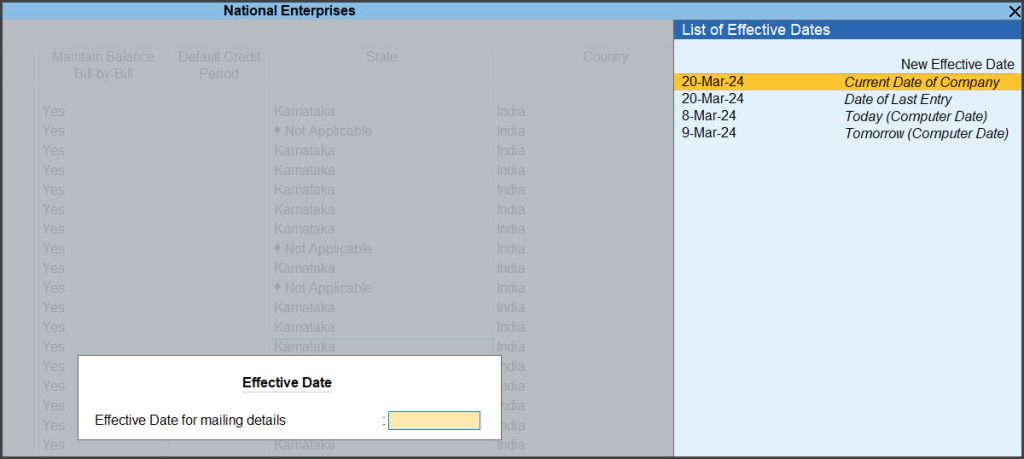
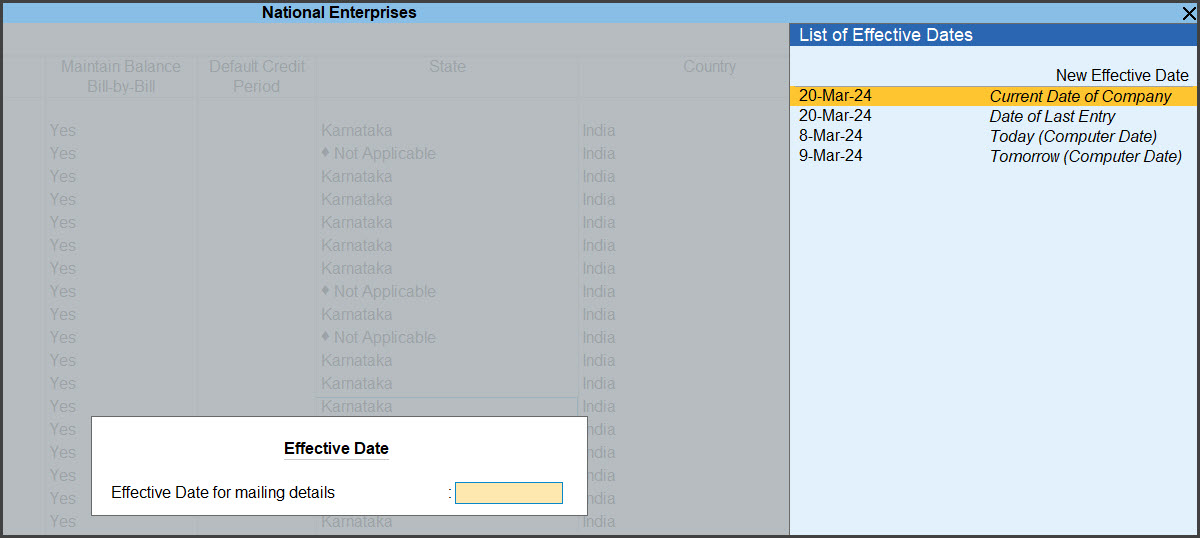
- Enter the Effective Date for MSME Registration Details and press Enter.

- Press Ctrl+A to save the ledger master.
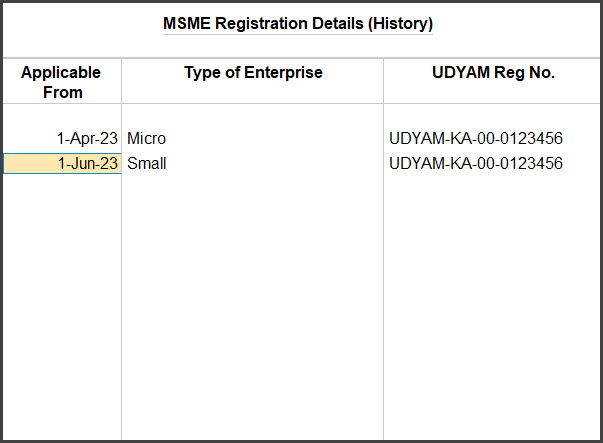
MSME Registration Details History
In case you make the change to you registration details due to change in the enterprise type or other such updates, and provide effective date for such changes to be applicable from, then all such changes are recorded and can be accessed from the history.
You can view the history of changes made to MSME registration details.
- Press Ctrl+I (More Details).
- Select MSME Registration Details (History)
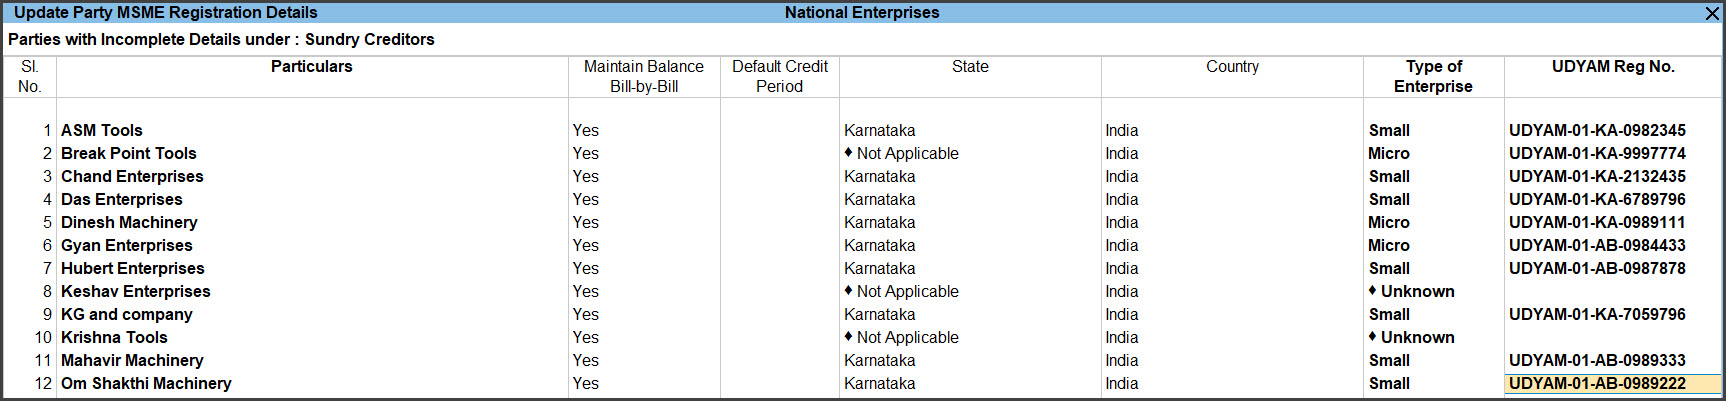
Update UDYAM Details for Multiple MSME Suppliers
TallyPrime provides option to update the UDYAM Details of multiple suppliers at once. This will help you update MSME details of all your MSME suppliers in one go.
- Press Alt+G (Go To) > type or select Update Party MSME Details.
Alternatively, Gateway of Tally > Display More Reports > Statutory Reports > MSME Reports > Update Party MSME Details. - Select a specific group or All items in the Name of Group field.
- Select a specific ledger or All items in the Name of Ledger field.
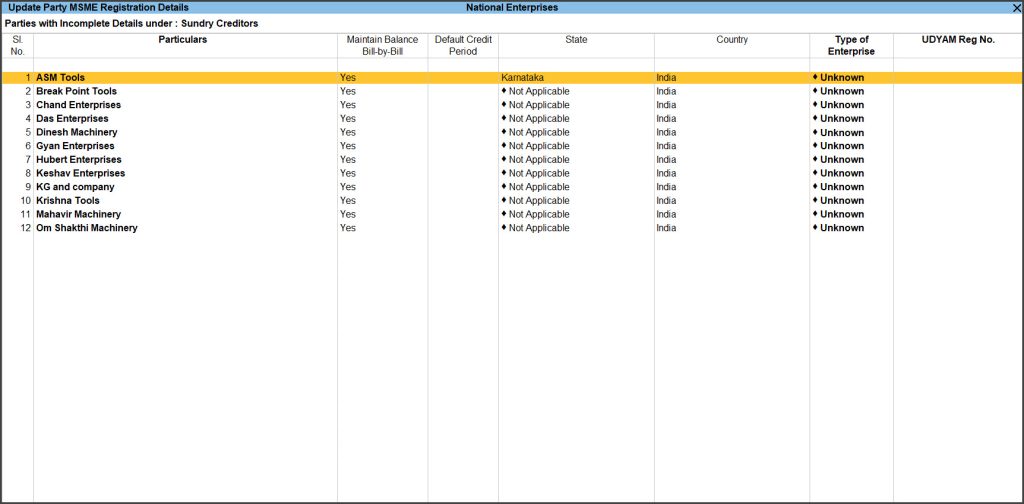
- Select the party to update the UDYAM details and Alt+H or Enter.
- Select the Type of Enterprise and enter UDYAM Reg No. of the party.
- Press Enter.
- Enter the Effective Date for Revised MSME Registration Details to apply the UDYAM details from that date.
- Press Enter.

- Press Enter or Y to save the UDYAM Details for the party.
You can also enter the UDYAM details for all parties in the same screen.
- Press Alt+R (Multi Alter).
- You can enter Default Credit Period, Type of Enterprise, and UDYAM Reg No. in the respective columns for any party.

- Enter Effective Date for each party that you alter.
- Press Ctrl+A to save the details.
Check Upcoming Due Dates for Payables
As a buyer, you need to identify and track the payments related to MSME suppliers or service providers to avoid exceeding the date agreed upon between you and the supplier. You need to consider all bills from MSMEs and cannot afford to miss out on any bill. The penal interest chargeable for delayed payment to an MSME enterprise is three times the bank rate notified by the Reserve Bank of India.
In case of delayed payments, MSME can file a complaint with MSME Samadhaan to get the payment along with interest.
- Press Alt+G (Go To) > type or select Group Outstanding > Sundry Creditors.
Alternatively, Gateway of Tally > Display More Reports > Statement of Accounts > Outstandings > Payables.

- Press Ctrl+B (Basis of Values).
- Select Show Bills of and press Enter.
- Select Micro & Small Parties option to view only the bills of micro and small parties.
- Press Enter.

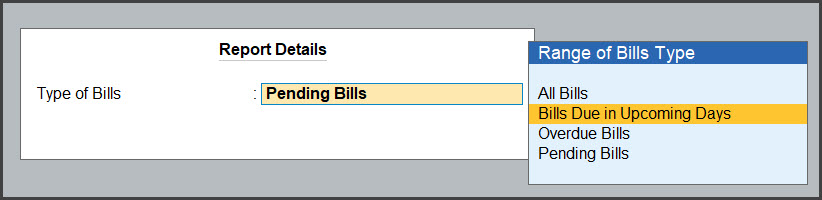
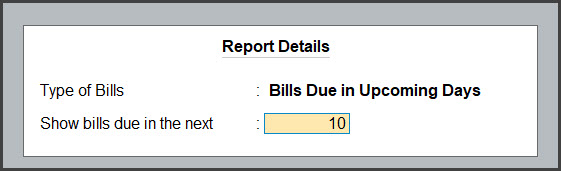
- Select Type of Bills and press Enter.
Select the following based on:

-
- All Bills, to view all the payable bills.
- Bills Due in Upcoming Days, to see bills that upcoming in a specific number of days. You can specify the number of days in Show bills due in the next.
- Overdue Bills, to see only the bills that are overdue.
- Pending Bills, to only the pending bills.
- In the Show bills due in the next field, enter the number of days to see bills that become due within the given number of days. This option appears only when you select Bills Due in Upcoming Days.
- Press Enter.
- Press Ctrl+A to save.


The report shows the bills based on the selection in Basis of Value. In case you had selected Bills Due in Upcoming Days and set the number of days as 10, the bills that are due in the next 10 days are shown.
By default, the report displays the Due on date for all the bills. You can change this to days until due date, overdue days, and overdue days from bill date.
Configuration
You can add further details to the report using the configuration options.
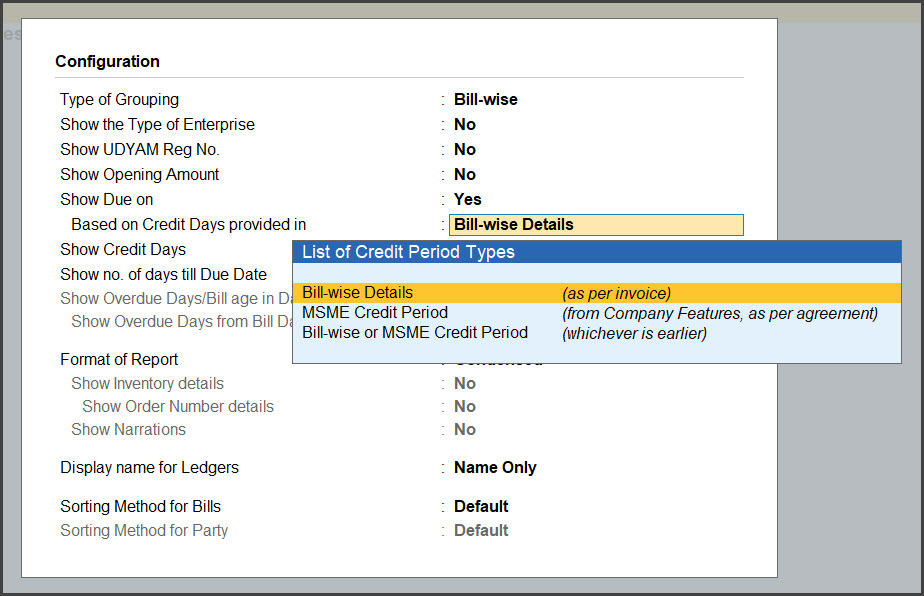
- Show Due on: Set this option to Yes, to view the date on which a bill becomes due for payment. The due date is considered based on the credit days set for the party. It can be the credit days specified in the invoice or in Credit Days Allowed for Micro & Small Parties under F11.
Note: The No. of Credit Days Allowed for MSMEs can be of two types, a. where there is an agreement with the MSME and b. where there is no agreement. Both type of credit days can be set. The due date will be calculated on the type of credit days configured.

- Show no. of days till Due Date: Set this option to Yes to view number of days until the due date for each bill in Days till Due Date column.
- Show Overdue Days/Bill age in Days: Set this option to Yes to view the number of overview days in Overdue by Days column.
- Show Overdue days from Bill Date: Set this option to Yes to view the number of days since the day of billing in the Age of Bill in Days column.
View and Export MSME Form 1 Statement
As per a notification issued by the MCA, buyers from MSMEs should file disclosures through MSME Form 1 containing all the current outstanding dues to MSMEs periodically (1-Apr to 30 Sep) & (1-Oct to 30 Apr).
It is mandatory to file the MSME form 1 to avoid fines for non-furnishing/incomplete/incorrect information penalty.
TallyPrime provides Statement of MSME Form 1 with all the required details. The form lists all the MSME suppliers with UDYAM Details and having current outstanding dues. You can print the Form in the format prescribed for filing returns.
- Press Alt+G (Go To) > type or select MSME Form 1 Statement.
Alternatively, Gateway of Tally > Display More Reports > Statutory Reports > MSME Reports > MSME Form 1 Statement.

- Press Alt+P (Print).
- Select Return Form and press Enter.
- Press P (Print) to print the MSME 1 form.


The MSME Form 1 statement in TallyPrime by default displays all the details required to be filed in returns. You can add further details using the configuration options.
Configuration
You can add further details to the report using the configuration options.
Show the Type of Enterprise: Enable this option to show the Type of Enterprise set in the ledger master of the MSME suppliers.
Show PAN/IT No.: Enable this option to display the PAN/IT number of the MSME party.
Show UDYAM Reg No.: Enable this option to display the UDYAM number of the party, this is enabled by default.
Show Due on: Enable this option to display the Due on of each bill. This is set to Yes by default.
Based on Credit Days provided in: Under this you can select the option to arrive at Due On date, The options provided are:
- Bill-wise Details (as per invoice)– Due on date is arrived based on credit days specified in bill-wise details of the invoice.
- MSME Credit Period (from Company features, as per agreement) – Due on date is arrived based on msme credit days set for the party.
- Bill-wise or MSME Credit Period (whichever is earlier) – Due on date is arrived based on earliest credit days set in bill-wise and in msme credit days.
Show Cleared On: Enable this option to see the date on which the bill was paid off.
Show Credit Days: Enable this option to see the credit days set for the MSME party
Show no. of days till Due Date: Set this option to Yes to view number of days until due date for each bill in Days till Due Date column.
Show Overdue Days/Bill age in Days: Set this option to Yes to view the number of overview days in Overdue by Days column.
Show Overdue days from Bill Date: Set this option to Yes to view the number of days since the day of billing in the Age of Bill in Days column.