Automated Backup in Tally ERP 9

This feature allows the user to safeguard his company data. The Automated Backup or Auto Backup is a capability that automatically takes data backup in the background without any disturbance or affecting your work.
Auto Backup can be carried out by executing the following steps:
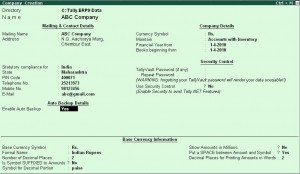
Go to Company Creation/Alteration screen of the required company.

  • Set Yes to Enable Auto Backup as shown:
  • Save the Company Creation/Alteration screen.
  • The data backup is stored in the data folder of the respective company.
    E.g.: A company titled ABC Company has a folder 10000 located in C:\Tally.ERP9\Data. On enabling Auto Backup
    feature the backup file ABK.900 is created in C:\Tally.EPR9\Data\10000
    How to hide or protect your data in Tally ERP 9

    Data is more important and crucial for everyone. There are several ways to protect your data from unwanted people. Its upto you, from whom you want to protect your data or hide your data.  The technique which we can use in Tally is either

    Security Control : (protect from people within our Company)

    Tally Vault Password : (protect from outside people eg. Income tax, Sales Tax person)

    Simple steps
    Gateway of  Tally > Comp Info (Alt + F3) > Alter > Company Alteration Screen
    Enable Tally Vault and Security Control
    Hide and Protect Tally Data

    Setting Credit Limit in Tally ERP 9

    You can set credit limit for Sundry Debtors and Sundry Creditors in Tally.ERP 9.

    When outstanding amount exceeds the credit limit, Tally.ERP 9 will not allow any invoice beyond that limit unless modified.

    Example :

    You can set credit limit of Rs. 40,000/- for the customer’s ledger and raise one invoice amounting to Rs. 2o,000/-, subsequently you can also try to raise another invoice amounting Rs. 25,000/-

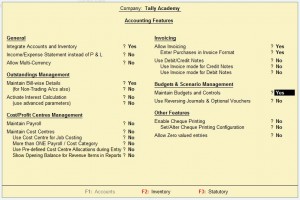
    To enable credit limit, set Maintain Budget and Control to Yes in F11 > Accounting Features

    To set credit limit for customer :

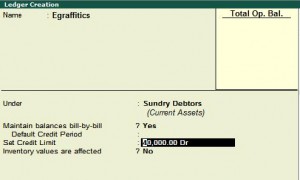
    Go to Gateway of Tally > Accounts Info > Ledgers > Ledger > Set the credit limit

    Setting Credit Limit in Ledger

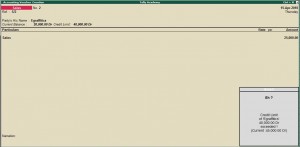
    After the first invoice is raised for Rs. 20,000/-, try to raise the second invoice for Rs. 25,000/-. Here, Tally.ERP 9 will restrict from saving the voucher

    Exceeding Credit Limit

    Short Cut Key – Function Key Combination

    Windows Functionality Availability

    F1

    To select a company At all masters menu screen

    F1

    To select the Accounts Button At the Accounting Voucher creation and alteration screen

    F1 (ALT+F1)

    To select the Inventory

    To view the detailed or condensed report

    At the Inventory/Payroll Voucher creation and alteration screen

    In almost all the Reports

    F1 (CTRL + F1)

    To select Payroll Vouchers to alter At the Accounting/Inventory voucher creation or alteration screen.

    F2

    To change the current date

    To select company inventory features

    At almost all screens in TALLY.ERP 9

    At the F11: Features screen

    F3

    To select the company

    To select Company Statutory & Taxation features

    At almost all screens in TALLY.ERP 9

    At F11: Features screen

    F4

    To select the Contra voucher At Accounting / Inventory Voucher creation and alteration screen

    F5

    To select the Payment voucher At Accounting / Inventory Voucher creation and alteration screen

    F6

    To select the Receipt voucher At Accounting / Inventory Voucher creation and alteration screen

    F7

    To select the Journal voucher At Accounting / Inventory Voucher creation and alteration screen

    F8

    To select the Sales voucher At Accounting / Inventory Voucher creation and alteration screen

    F8 (CTRL+F8)

    To select the Credit Note voucher At Accounting / Inventory Voucher creation and alteration screen

    F9

    To select the Purchase voucher At Accounting / Inventory Voucher creation and alteration screen

    F9 (CTRL+F9)

    To select the Debit Note voucher At Accounting / Inventory Voucher creation and alteration screen

    F10

    To select the Reversing Journal voucher At Accounting / Inventory Voucher creation and alteration screen

    F10 (Ctrl + F10)

    To select the Memorandum voucher At Accounting / Inventory / Payroll Voucher creation and alteration screen

    F11

    To select the Functions and Features screen At almost all screens in TALLY.ERP 9

    F12

    To select the Configure screen At almost all screens in TALLY.ERP 9

    Master Synchronisation

    Upcoming Feature :

    Master synchronisation in Tally.ERP 9 lets businesses set common Master behavior at the Head Office or any central location. When Masters are altered, the change is reflected at the other end without duplicating or creating a new Master-streamlining the process across locations and avoiding Chart of Accounts complication.

    Benefits:

    •  Improved speed and better performance
    •  No duplication one Co A across HO and all locations
    •  More accurate reports
    •  Simple to manage
    •  Simple accounting no need to spend time eliminating extra vouchers
    •  Better command over reports

    Hardware Requirement for Tally.ERP 9

    To install Tally.ERP 9, the user needs to have administrator rights (Create, Write, Update, Modify and Delete permissions). Multilingual users must ensure that the operating system supports multiple languages. The Hardware requirements and Operating system required for a Client-Server and a standalone computer are as described below:

    Particulars Recommended Configuration
    Processor Intel Pentium IV or above and Equivalent
    RAM 512 MB or more*
    Hard Disk space 60 MB Minimum (Excluding Data)
    Monitor Resolutions 1024 x 768 or Higher*
    Operating System Microsoft Windows 7/Vista/XP/2003/2000/NT/ME/98

    * Tally.ERP 9 will work on lower configurations too; however Tally do not recommend the same.

    Opening balance for Input Tax Credit

    How to  provide the opening balance for Input Tax Credit in a new Company?

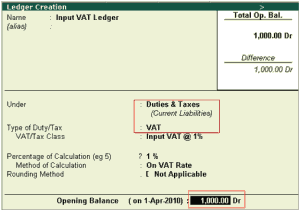
    Yes, it is possible to provide the Opening Balance for Input Tax Credit in a newly created company by giving the amount in the Opening Balance field followed by Dr for the Input VAT Ledger grouped under Duties & Taxes and Type of Duty/Tax as VAT. The opening balance will be displayed in the VAT Computation and the respective Forms. Selection of Vat/Tax class is optional.