Fundamentals of Accounting | Accounting Basics

What is accounting?

To understand the fundamentals of accounting, you must comprehend the definition of accounting.

Accounting is consolidating the financial transactions of a company using a systematic approach. It involves recording, analyzing, reporting, and retrieving financial transactions when required. Accounting is mandatory for legal reasons, taxes, and to understand business health. Accounting ensures that every business transaction is accounted for and if you need to pull out information about any expense you can do so with ease.  Accounting can be divided into two parts; financial accounting and management accounting.

Financial accounting deals with the proper presentation of the transactions in the form of financial statements such as income statements which are shared with people outside the business. Management accounting is a form of accounting whereby the management department receives financial information so they can take vital business decisions to ensure efficient business continuity. Management accounting is part of the internal process as it is used for improving the overall business. It includes information such as the budget.

Key objectives of accounting

The three key objectives of accounting are as follows.

  • Record keeping

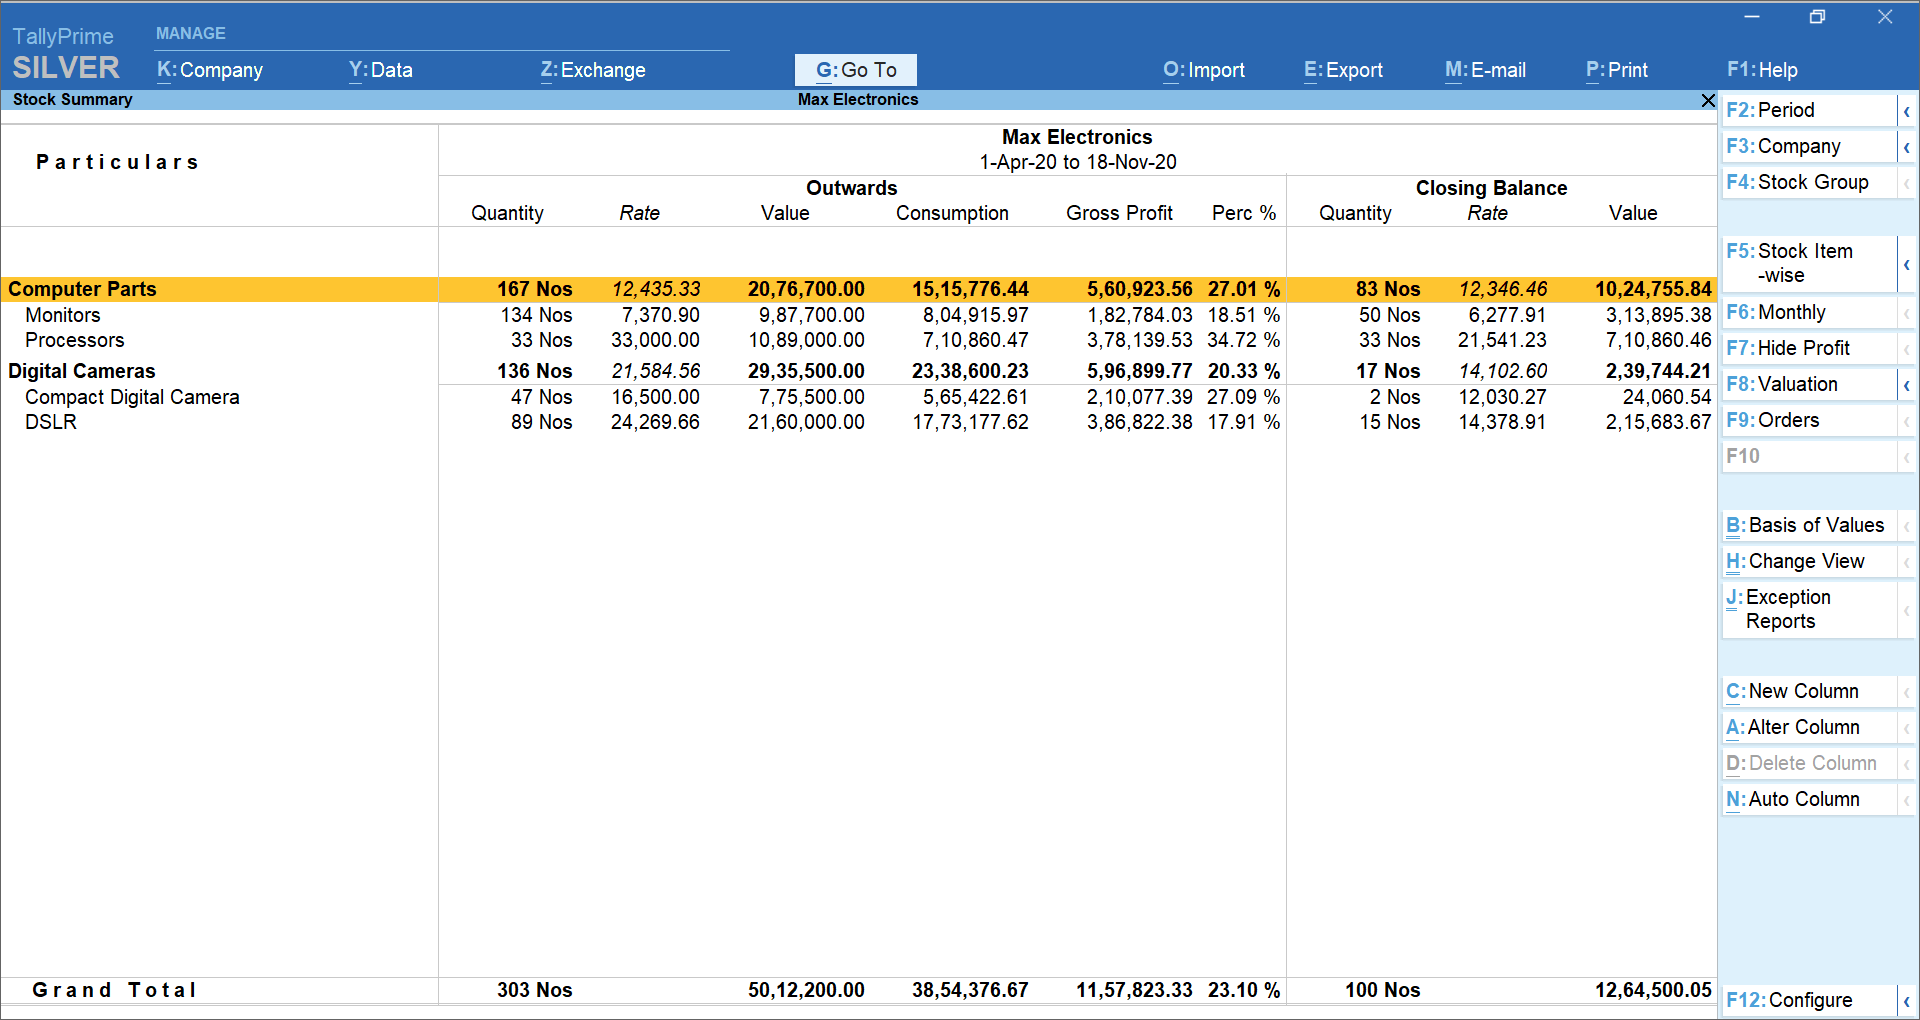
The fundamentals of accounting include record keeping which is the primary function of accounting. A business must use standard forms of storing and retaining information so it can be retrieved when the need for it arises. Thorough and accurate storage of records is essential for all transaction-related purposes. A software package such as TallyPrime can be utilized to store every transaction that takes place.

  • Reporting

Financial reporting is a key accounting objective after record keeping. Accounting enables businesses to record and report their financial status at the end of a particular period. It involves putting together transaction details and reports that are necessary to make sense of a certain aspect of a business during a specific time period. Financial statements are results of aggregating financial information of a business and these are useful tools for reporting the financial parts of a business.

  • Analysis

The reports which are based on the business records are analyzed in accounting. When business health needs to be determined then the business reports are analyzed. Analysis in accounting enables accountants to find out ways to improve business efficiency, upgrade processes, and to see where unnecessary expenses are being made. Analysis of financial reporting allows your business to run without problems as it ensures no discrepancies are found.

TallyPrime

Accounting solutions to help you manage your business just the way you want.

Accounting process and steps

The accounting process is one of the fundamentals of accounting. Also known as an accounting cycle, it follows a transaction from the moment it was recorded to when a report is made using various transactions that occurred in a particular period of time. Businesses can use single-entry accounting or double-entry accounting. Firms use accounting software packages such as TallyPrime to automate the accounting process. The benefits include saving time, effort, and money for storage, analysis, and retrieval purposes. Companies can fully automate their accounting or they can leave some aspects to be manually handled.

Steps of the accounting process

There are 8 steps in the accounting process. This is a framework and it can vary from company to company as each company has an individual model that it works with.

  • Step 1: Transaction identification

You need to identify your business transactions first. Every unique transaction needs to be recorded so that it is reflected correctly. All expenses such as costs to acquire, repair, and upgrade need to be accounted for. Additionally, every sale record must be stored so it all sales transactions are in one place.

  • Step 2: Journal creation

This step involves recording each transaction in a journal. You can choose between two types of accounting; cash accounting and accrual accounting. The difference is when the transactions are recorded and stored. Cash accounting is recorded the moment the cash is paid or received. Accrual accounting is when transactions are recorded as they occur.

  • Step 3: General ledger posting

After the entry in the journal, the transaction details need to be reflected in the general ledger. The general ledger allows the categorization of transactions because they are saved according to different accounts. That is, transactions of the same account are recorded in one place and so on. This allows easy monitoring according to particular accounts.

  • Step 4: Trial balance

In this step, the trial balance is calculated. Ideally, the debits must be equal to credits for every account. The trial balance throws light on the balances which have not been adjusted yet in every account. When an unadjusted trial balance is found, it is analyzed in the next step of the accounting cycle

  • Step 5: Worksheet analysis

Adjustment of the various transaction entries is done in this step of the accounting process. First, you need to create a worksheet and make sure that the credits and debits are equal to each other. In the case of accrual accounting, there is an additional step here which is to adjust the entries for revenue and expense matching purposes.

  • Step 6: Journal entries adjustment

This is the stage in the accounting cycle where adjustments need to be made. Once the adjustments have been done, the trial balance is prepared again to ensure that the debits are equal to the credits. Only then can you move on to the next step.

  • Step 7: Financial statements

This step involves the financial statements that are generated after all the entries have been adjusted in the journal. In the majority of the cases, the major financial statements will include the cash flow statement, income statement, and balance sheet. These uncover the truth behind how the business is doing financially and how much profits it is earning.

  • Step 8: Closing

The last step of the accounting cycle is when the books are closed. This holds for the temporary accounts as they are shifted to permanent accounts. For example, the profit and loss statement is transferred to the retained earnings accounts and so on. The closing occurs at the end of the reporting period. After this, the cycle starts again.

Key accounting reports

The critical accounting reports are as follows.

  • Balance sheet

The balance sheet contains information about the total liabilities, assets, and stockholder equity. It gives information about the company’s resources and how these sources are being financed. A balance sheet can help you make better business decisions.

  • Profit and loss statement

The profit and loss statement is also known as P&L and income statement. It shows the revenues and expenses of a business over a period of time. A business is going in the right direction when the profits exceed its losses.

  • Statement of cash flows

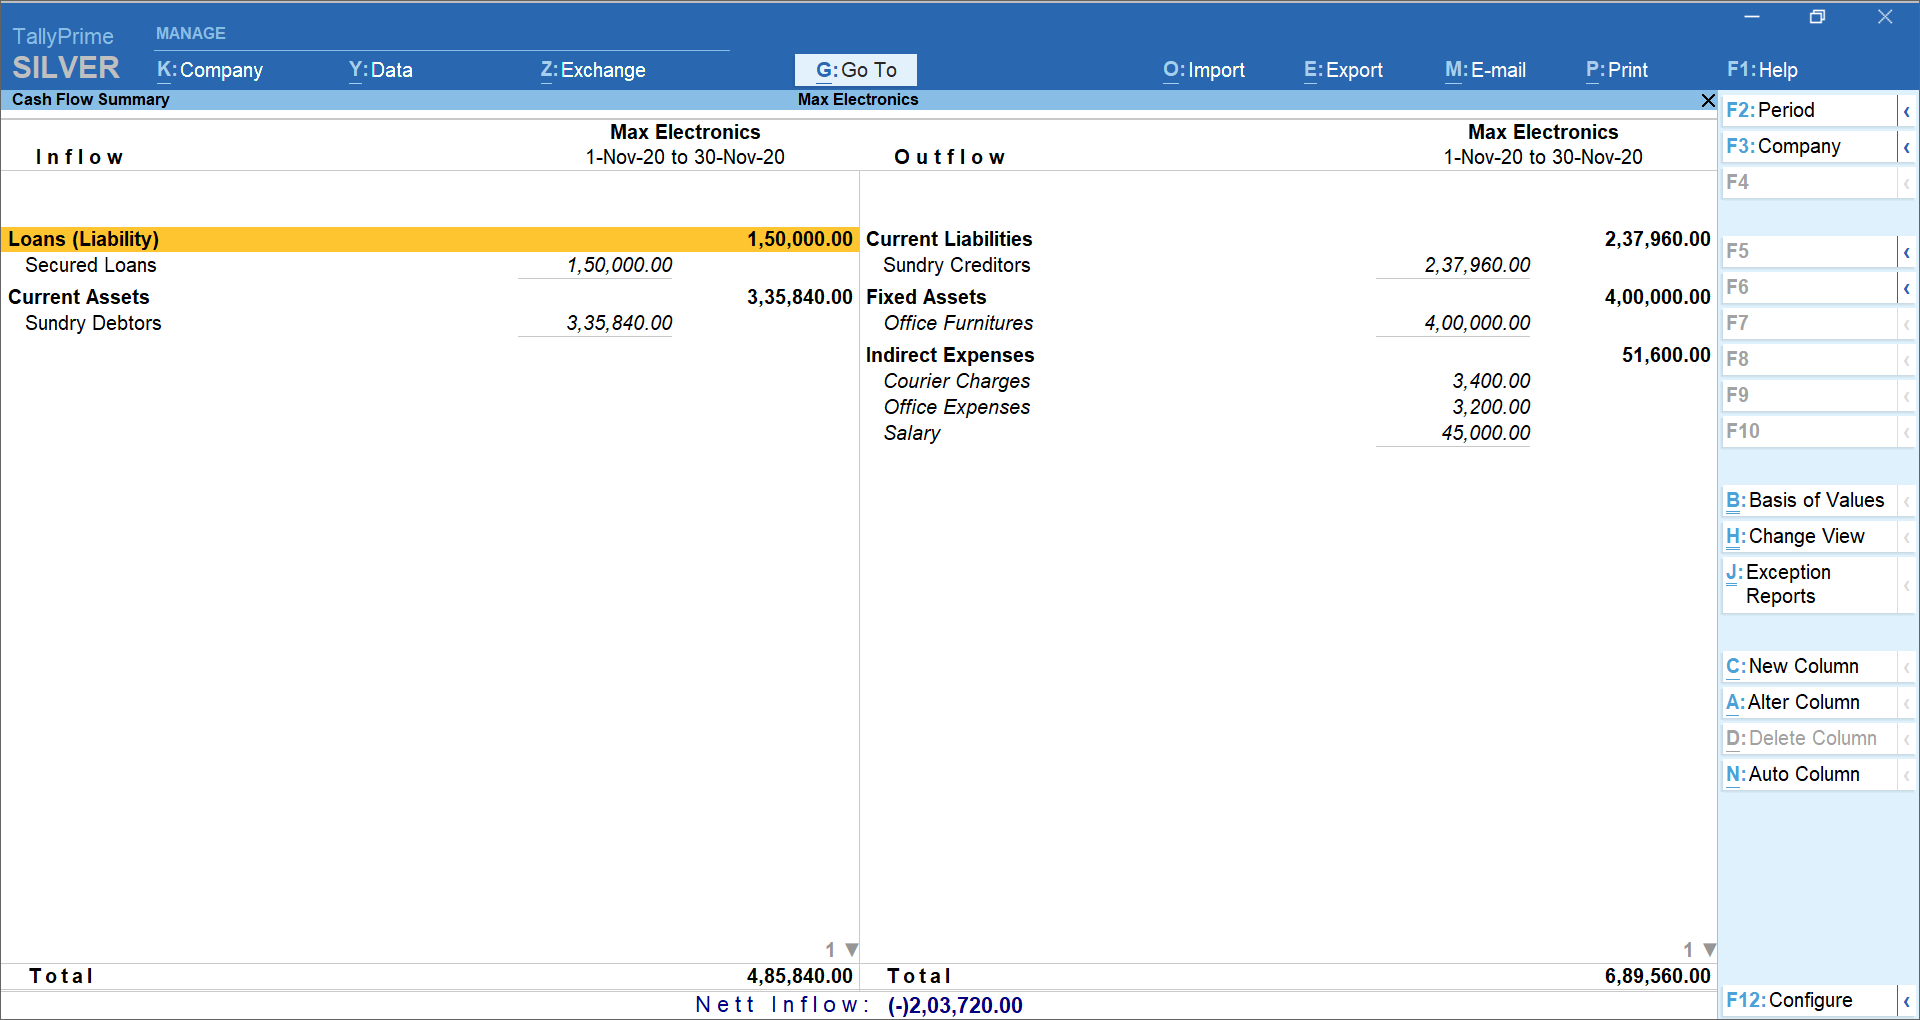
This report summarizes the cash that is received or paid. It doesn’t reflect the non-cash transactions that take place such as purchases made on the basis of credit. It contains three parts; investing, operating, and financing. It gives information about cash generation.

How accounting software helps businesses

An accounting software tool can take the complexity out of accounting. Whether the business is small, growing, or enterprise-level, every business needs an accounting software package. TallyPrime is the best example of accounting software that handles everything. All you need to do is record the bills and invoices. TallyPrime will automate the rest. It minimizes human errors, automates management of books of accounts, generates informative customized reports and financial statements, and makes tax returns easy. Additionally, it improves inventory management, ensures tax compliance, streamlines business processes, aids in business forecasting, and accurately generates financial statements. This ensures you know how your business is doing at every step of the way.

Some of the key features of TallyPrime:

  • Record and bookkeeping
  • Invoicing and billing
  • Pre-defined chart of accounts
  • Accounts receivable and payable management
  • Wide range of accounting and financial reports
  • Multi-currency support
  • Sales and Purchase Management
  • Online business reports
  • Inventory Management
  • Taxation support

Tally Prime Shortcut Keys

Shortcuts That Work Across Tally Prime

Shortcut Key Description
Alt+G To primarily open a report, and create masters and vouchers in the flow of work.
Ctrl+G To switch to a different report, and create masters and vouchers in the flow of work.
Alt + E To open the export menu for exporting masters, transactions, or reports.
Alt+K To open Company top menu.
Alt + K To open the company menu with the list of actions related to managing your company.
Alt + M To open the e-mail menu for sending transactions or reports.
Alt + O To open the import menu for importing masters, transaction, and bank statements.
Alt + P To open the print menu for printing transactions or reports.
Alt + Y To open the list of actions applicable to managing the company data.
Alt + Z To open the list of actions applicable to sharing or exchanging your company data.
Alt + F3 To select and open another company located in the same folder or other data paths.
Ctrl + F1 To open Tally Help topic based on the context of the screen that is open.
Ctrl + F3 To shut the currently loaded companies.
Ctrl + K To select the display language that is applicable across all screens.
Ctrl + W To select the data entry language that is applicable to all screens.
Ctrl + Left /
Ctrl + Right
To move to the left-most/right-most drop-down top menu.
Ctrl + Up /
Ctrl + Down
To move to the first/last menu in a section.
Home To from any point in a field to the beginning of the text in that field.
Home &PgUp To move from any line to the first line in a list.
End To move from any point in a field to the end of the text in that field.
End &PgDn To move from any line to the last line in a list.
Esc To go back to the previous screen by closing the currently open screen.
Esc To remove inputs that is provided/selected for a field.
F1 To open the Help menu.
F11 To open Company Features screen.
F12 To open the list of configurations applicable for the report/view.
F3 To switch to another company from the list of open companies.
Left arrow To move:
One position left in a text field
To the previous column on the left
To the previous menu on the left
Right arrow To move:
One position right in a text field
To the next column on the right
To the next menu on the right
Up arrow To move one line up in a list.
To move to the previous field.
Down arrow To move one line down in a list.
To move to the next field.

Shortcuts in Reports | Tally Prime Shortcut Keys

Shortcut Key Description
Alt + 2 To create an entry in the report, by duplicating a voucher.
Alt + A To add a voucher in a report.
Alt + A To alter a column
Alt + C To add a new column.
Alt + D To delete an entry from a report.
Alt + D To delete a column.
Alt + F1
Alt + F5
To view the report in detailed or condensed format.
Alt + F12 To filter data in a report, with a selected range of conditions.
Alt + I To insert a voucher in a report.
Alt + N To auto repeat columns.
Alt + T To hide or show the details in a table.
Alt + U To display all hidden line entries, if they were removed.
Alt + V To open the GST Portal.
Ctrl + Alt + I To invert selection of line items in a report.
Ctrl + B To view values in different ways in a report.
Ctrl + Enter To alter a master during voucher entry or from drill-down of a report.
Ctrl + F12 To calculate balances using vouchers that satisfy the selected conditions.
Ctrl + H To change view – display report details in different views.
To navigate to Voucher View from Summary reports.
To navigate to post-dated cheque related transactions report.
Ctrl + J To view the exceptions related to a report.
Ctrl + R To remove an entry from a report.
Ctrl + Shift + End To select or deselect lines till the end.
Ctrl + Shift + Home To select or deselect lines till the top.
Ctrl + Space bar To select or deselect all lines in a report.
Ctrl + U To display the last hidden line (If multiple lines were hidden, pressing this shortcut repeatedly will restore the last hidden line first and follow the sequence).
Enter To drill down from a line in a report.
Shift + Enter To expand or collapse information in a report.
Shift + Sapce bar To select or deselect a line in a report.
Shift + Up /
Shift + Down
To perform linear selection/de-selection multiple lines in a report.
Space bar To select/deselect a line in a report.

Shortcuts in Vouchers | Tally Prime Shortcut Keys

Shortcut Key Description
F4 To open Contra voucher.
F5 To open Payment voucher.
F6 To open Receipt voucher.
F7 To open Journal voucher.
F8 To open Sales voucher.
F9 To open Purchase voucher.
F10 To view list of all vouchers.
Alt + F5 To open Debit Note.
Alt + F6 To open Credit Note.
Alt + F7 To open Stock Journal voucher.
Alt + F8 To open Delivery Note.
Alt + F9 To open Receipt Note.
Alt + C To open the calculator panel from Amount field.
Alt + D To delete a voucher/transaction.
Alt + R To retrieve Narration from the previous ledger.
Alt + S To open the Stock Query report for the selected stock item.
Alt + V To open a manufacturing journal from the Quantity field of a journal voucher.
Ctrl + F4 To open Payroll voucher.
Ctrl + F5 To open Rejection Out voucher.
Ctrl + F6 To open Rejection In voucher.
Ctrl + F7 To open Physical Stock.
Ctrl + F8 To open Sales Order.
Ctrl + F9 To open Purchase Order.
Ctrl + D To remove item/ledger line in a voucher.
Ctrl + F To auto fill details.
Ctrl + H To change mode: open vouchers in different modes.
Ctrl + L To mark a voucher as Optional
Ctrl + R To retrieve the Narration from the previous voucher, for the same voucher type.
Ctrl + T To mark a voucher as Post-Dated.

Shortcuts in Masters & Vouchers | Tally Prime Shortcut Keys

Shortcut Key Description
Tab To go to the next input field.
Page Up To open the previously saved master or voucher.
To scroll up in reports.
Page Down To open the next master or voucher.
To scroll down in reports.
Backspace To remove the value typed.
Shift + Tab To go to the previous input field.
Alt + C To create a master, on the fly.
Alt + C To open the calculator panel.
Ctrl + I To add more details to a master or voucher for the current instance.
Alt + 4 /
Ctrl + 4
To insert the base currency symbol in an input field.
Ctrl + C To copy text from an input field.
Ctrl + Alt + C To copy text from an input field.
Ctrl + V To paste input copied from a text field.
Ctrl + Alt + V To paste input copied from a text field.

Shortcuts for Vouchers & Reports | Tally Prime Shortcut Keys

Shortcut Key Description
Ctrl + E To export the current voucher or report.
Ctrl + M To e-mail the current voucher or report.
Ctrl + P To print the current voucher or report.
Alt + J To define stat adjustments.
Alt + X To cancel a voucher.
To cancel a voucher from a report.
Alt + Z To zoom in while on print preview.

Shortcuts for Reports, Vouchers & Masters | Tally Prime Shortcut Keys

Shortcut Key Description
+ To navigate to the next artifact in the context.
To increment the Report date or next report in a sequence of reports displayed.
– To navigate to the previous artifact in the context.
To decrement Report date or previous report in a sequence of reports displayed.
F2 To change the date of voucher entry or period for reports.
Alt + Enter To expand or collapse a group in a table.
Alt + F2 To change the date of voucher entry or period for reports.
Ctrl + End To move to the last field or last line.
Ctrl + Home To move to the first field or first line
Ctrl + A To accept or save a screen.
Ctrl + N To open or hide calculator panel.
Ctrl + Q To exit a screen or the application.

Shortcuts for Data Processing | Tally Prime Shortcut Keys

Shortcut Key Description
Ctrl + Alt + B To view the build information.
Ctrl + Alt + R To rewrite data.
Ctrl + Alt + T To view TDL / Add-on details
Alt + Z To synchronize data.
Alt + F4 To quit the application.


e-Invoice under GST?

e-Invoice

Ever since the concept of e-invoicing was approved by the GST council, the buzz around e-invoicing has gained importance among the business community. The introduction of e-invoice was approved by GST council at its 37th  meeting held in the month of September,2019 with the key objective to ensure inter-operability of e-invoices across the GST eco-system.

Invoice being a key document and e-invoicing being a reform related to it, it is super important for businesses to understand it fully and accordingly prepare towards to it.

In this article, let’s discuss and understand everything about e-invoicing under GST.

What is e-invoice in GST?

e-Invoice known as ‘Electronic invoicing’ is a system in which all B2B invoices are electronically uploaded and authenticated by the designated portal.

Post successful authentication, a unique Invoice Reference Number (IRN) is generated for each invoice by IRP. Along with IRN, each invoice is digitally signed and added with a QR code. This process is collectively called as e-invoicing under GST


Why e-Invoicing is introduced?

In spite of invoices generated by each software looks more or less the same, the computer system can’t understand it, though the business users can understand them fully. For example, an invoice generated by accounting Software “A” cannot be read by a machine which is using “B” accounting software.

Today, there are hundreds of accounting/billing software which generates invoices and all of them have their own formats to store the information. Owing to this, the GST system can’t read and understand these invoices, although the information in the invoice remains the same.

To cut the long story short, today the same information is presented in different invoice format and there is no way a system can understand it.

Hence, a need was felt to standardize the format in which electronic data of an invoice will be shared with others to ensure there is interoperability of the data.

What are the benefits of e-Invoice?

The basic aim behind the adoption of the e-invoice system is to pre-populate the returns and reduce the reconciliation challenges. This is achieved by the design of the IRP system which shares the invoice data to the GST system and e-way bill system. Thus, continuous uploading of invoice will ensure that most of the details required in returns as well in the e-way bill get auto-populated.

The following are some of the key benefits of e-invoicing:

  • Reduces reporting of same invoice details multiple time in different forms. It’s just one-time upload and everything, as required, will get pre-populated.
  • Part-A of e-Way bill will be auto-captured and only transporter details are required to be updated.
  • On uploading of invoices, the B2B details will be auto-captured in GSTR-1 return.
  • Substantial reduction in input credit verification challenges as the same data will get reported to the tax department as well to the buyer in his inward supply (purchase) register (GSTR-2A).
  • On receipt of info through GST System, a buyer can do a reconciliation with his Purchase register and accept/reject it on time under New Return.
  • Complete trail of B2B invoices and system-level matching of input credit and output tax helps to reduce tax evasion
  • Increase efficiency in tax administration by eliminating fake invoice.

When will e-invoicing be introduced?

To ensure that businesses get enough time to adapt to the new system of electronic invoicing, the GST Council has approved the introduction of e-invoicing in a phased manner.

  • Taxpayers with a turnover of  ₹500 crores and more, e-invoice is already introduced from 1st October 2020.
  • Businesses with a turnover of ₹100 crores  and more, it is applicable from 1st January, 2021.
  • For businesses with a turnover of ₹50 crores  and more, e-invicing is applicable from 1st April,2021

Type of business to whom e-invoice will be applicable?

Electronic Invoicing will be applicable to all the business who are registered under GST and issuing B2B invoices in phased manner as discussed above.

Who should upload the e-invoice?

Under the concept of e-invoice, the seller has to electronically upload the invoice to the IRP system and capture the QR code and IRN (Invoice Reference Number) in the physical copy of the invoice issued to the recipient.

What type of documents are to be reported to GST system?

Following documents are covered under the concept of e-invoice. Meaning the creator of these document needs to upload it to the IRP system.

  • Invoice by Supplier
  • Credit Note by Supplier
  • Debit Note by Supplier
  • Any other document as required by law to be reported by the creator of the document

How is e-invoice different from the current practice of invoicing?

E-invoice is a system in which the invoice needs to be electronically uploaded and authenticated with a unique invoice reference number (IRN) and digitally singed QR code. The change is that the seller needs to print the QR code and IRN number on the invoice before issuing it to the buyer.

Businesses using ERP/ business management software that seamlessly connects with IRP system and automatically prints the QR code and IRN on the invoice will find it easy to manage e-invoice requirements without much changes to the business process.

What are the modes of generating e-Invoice?

Multiple modes will be made available so that the taxpayer can use the best mode based on his/her need. The following are different mode of generating e-Invoice?

    • Web-Based,
    • API Based,
    • SMS Based,
  • Mobile App
  • offline tool based and
  • GSP based

Get Familiar with TallyPrime

Interactions in TallyPrime follow patterns that help you accomplish tasks with minimal learning. Understand these patterns so that you can try any feature.

Once you install TallyPrime, activate the license, and create a Company, you can start recording your business transactions. To make use of the flexibility of TallyPrime, and enhance your productivity, take a quick look at the interaction experiences and understand the patterns.

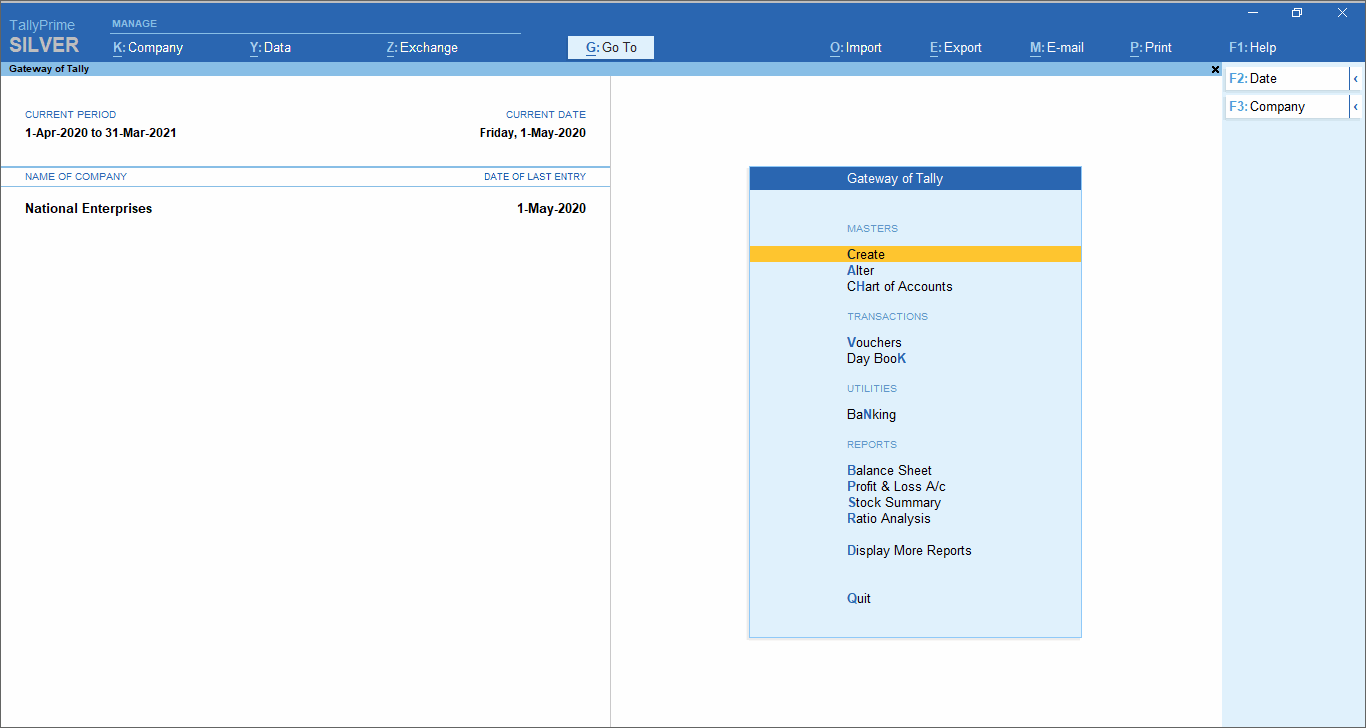
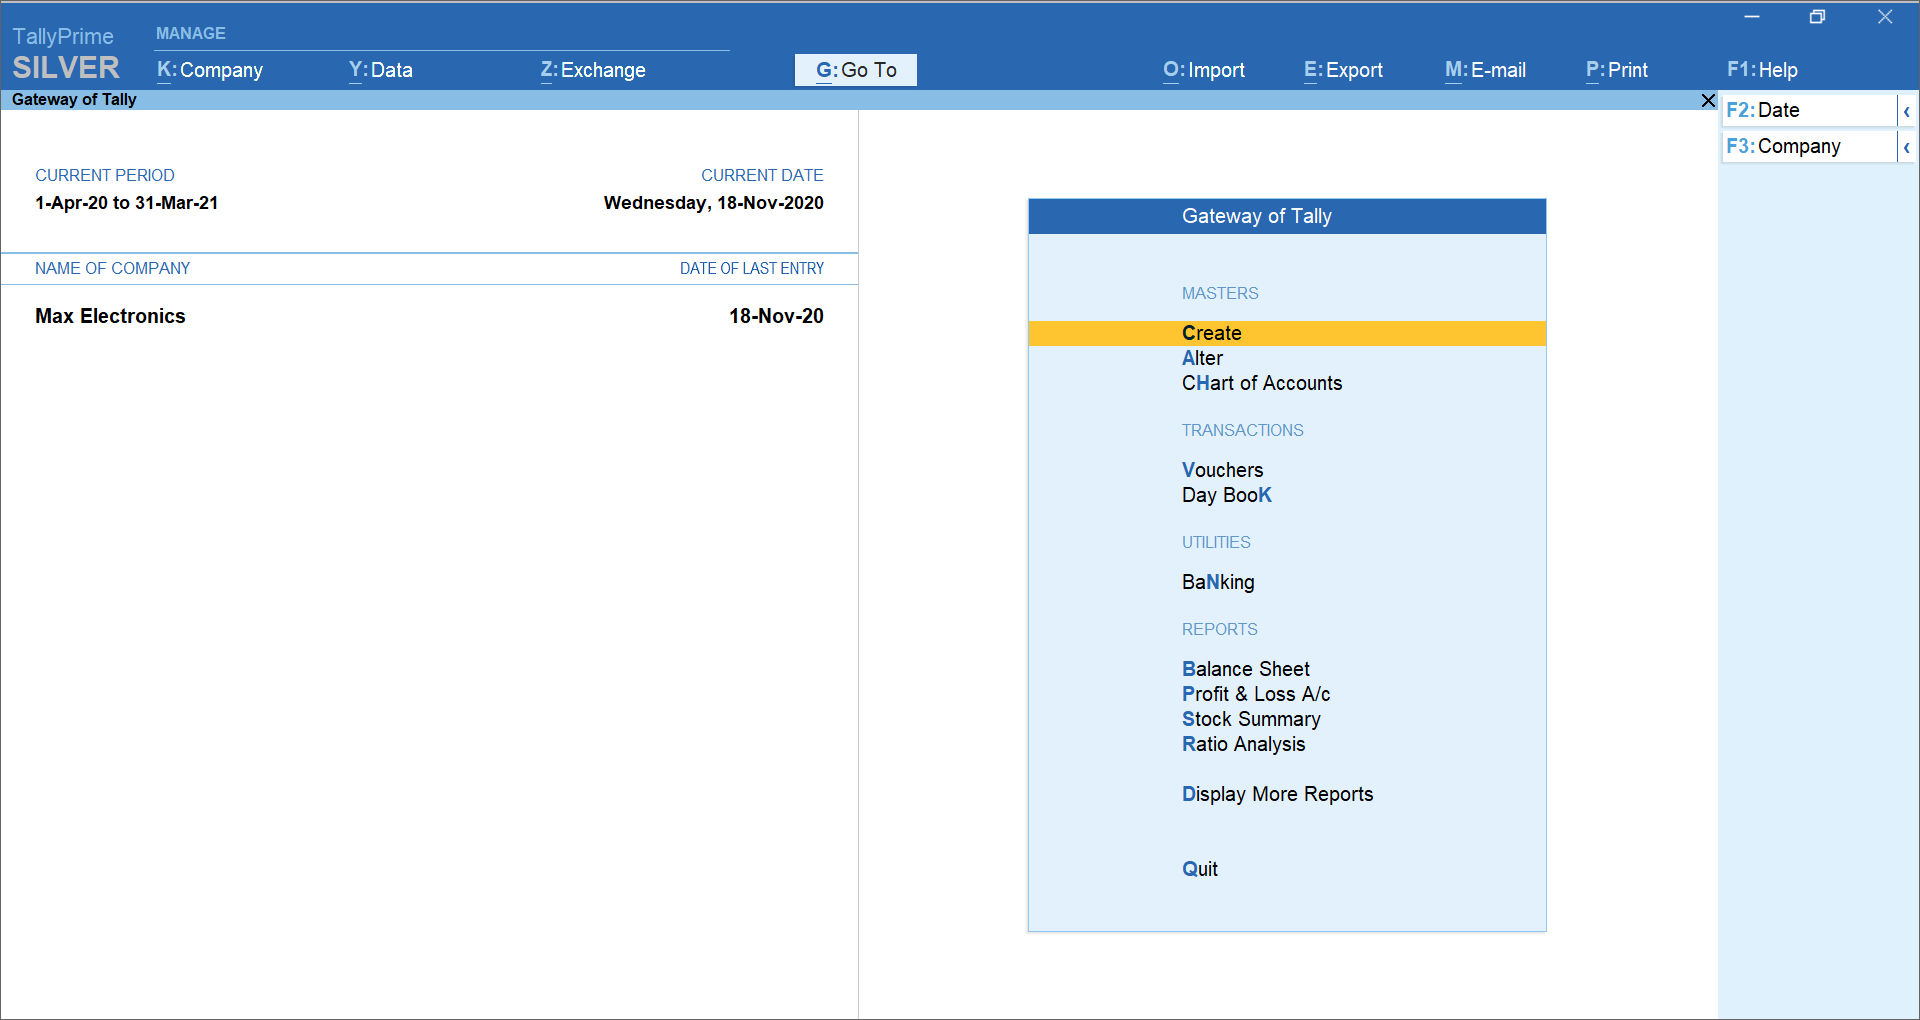
Home screen that you see when opening TallyPrime includes the top menu, Go To/Switch To buttons, Gateway of Tally, and buttons on the right hand side. These options aid in finding and opening different ledgers, vouchers and reports that help you accomplish your business tasks. There are multiple ways in which you can reach the desired destination. You can choose the ways you prefer.

Navigation across TallyPrime widely uses Enter key and Escape key. While there are different ways in which you can reach a destination, pressing Enter will take you to the next level of information, and Escape will take you back to the previous level, until you reach Gateway of Tally. The same Escape key will also let you close TallyPrime, with a confirmation. Similarly, you can use different key combinations to achieve what you want. In fact, you can navigate and control TallyPrime completely using a keyboard.

Data entry for recording different types of transactions are made similar to enhance learning, and retention of knowledge. Master creation is made simple by using similar actions wherever possible, and multiple ways to reach the create options.

Reports are presented in a hierarchical manner for easy analysis. While TallyPrime provides a large number of reports, reading and understanding the reports are simplified with similar interactions. When you open a report, summary data is provided for the most relevant report period. From there you can change the report period, presentation format, and so on, up to the value that forms the basis of the report. Consistent interactions make it easier for you to navigate, and memorise the steps.

Sharing data in printed formats, or in electronic file formats through e-mail or export is another facility available by default. You can share individual vouchers, or reports, as well as in bulk, with just a few key presses. Sending payslips to your employees, or reminder letters to your parties are equally simple.

Easy setup enables you to start using TallyPrime for recording your business transactions in a couple of minutes. While there are many features available out-of-the-box, you can decide to start with the minimal set, right away. You can start using the other features as and when you come across a business need. You can explore and use many features as your business grows and diversifies. This facility helps you to start simple, and gradually add more features as needed. Many features can be switched on and switched off as you want. Alternatively, you can start using all the features in the beginning, if needed.

Set up for personal preferences is another flexibility that you get to in order to use the application comfortably. Such configurations can be done independently for every installation of TallyPrime using F12 Configurations. Different types of ledgers and vouchers can have different configurations. In a similar way you can set your preferences for reports, printing, and other data communication options.

Home Screen

When you open TallyPrime, you can see a home screen with different items – a top menu bar with pull down options, the details of the Companies that are open, the Gateway of Tally menu, and a button bar on the right-hand side of the screen.

Gateway of Tally

Top Menu has options to manage your Companies, TallyPrime application, users in your Companies, and your data storage & sharing. This menu and child items in the menu are accessible from any screen in TallyPrime. Help menu has options to launch TallyHelp and to upgrade your application to a newer release of the product. Availability of a newer release is indicated with a red dot notification on the menu name Help. Other options under the Help menu include What’s New,  TallyShop for buying add-ons, Troubleshooting to repair your application and data in case there are issues, Settings to configure your application, TDL & Add-On to manage your extensions/customisations, and an About report that shows the details of your TallyPrime installation and its environment.

Shortcuts form an easy way to interact with TallyPrime. Shortcut/hotkey to access each option in the top menu is shown in bold capital letter that is underlined, or F1. When the shortcut has a single underline, you can just press Alt and the letter key to access the corresponding option. Shortcuts without underline work with the single key press. When you access any of the menu items, a list of options grouped under the menu item opens, and you can access each using the corresponding shortcut or mouse. For example, Alt+K > C will open Company Creation screen.

Tip: You can use just the keyboard to interact with TallyPrime if you prefer so. You can also comfortably use mouse. This is possible on all screens in TallyPrime.

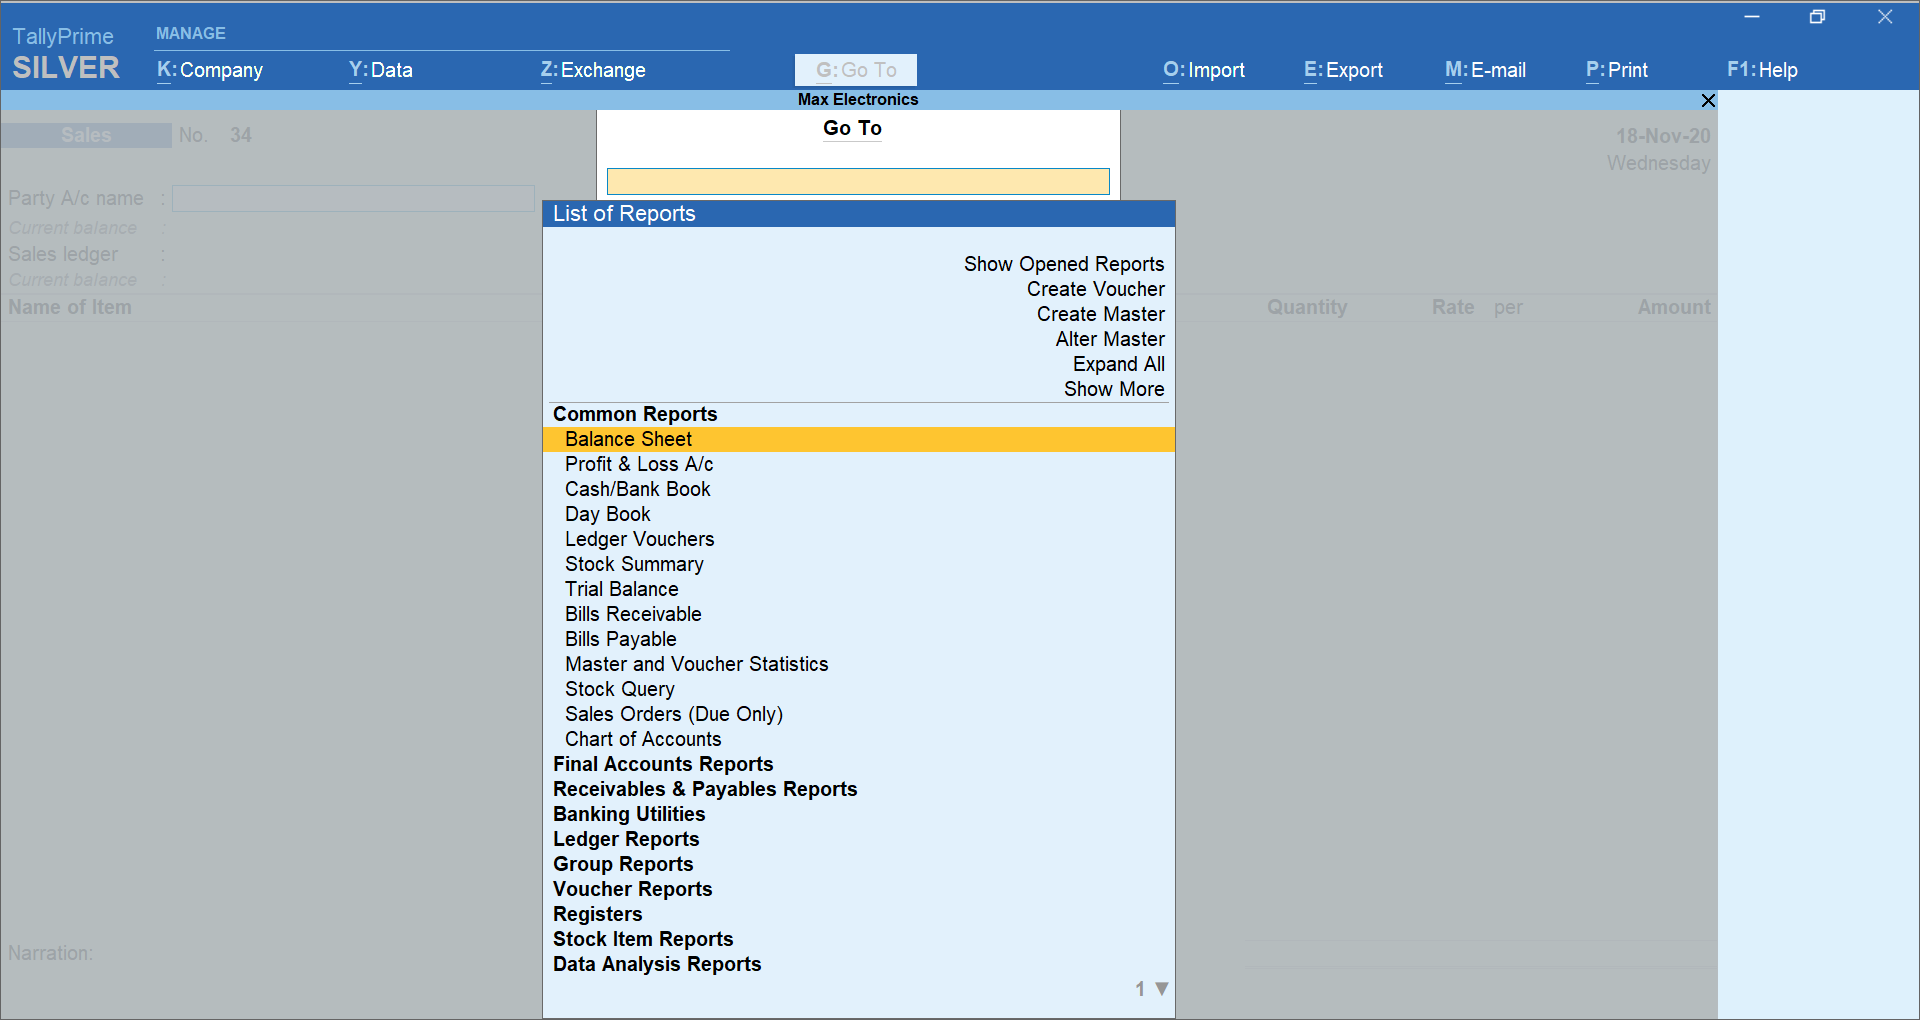
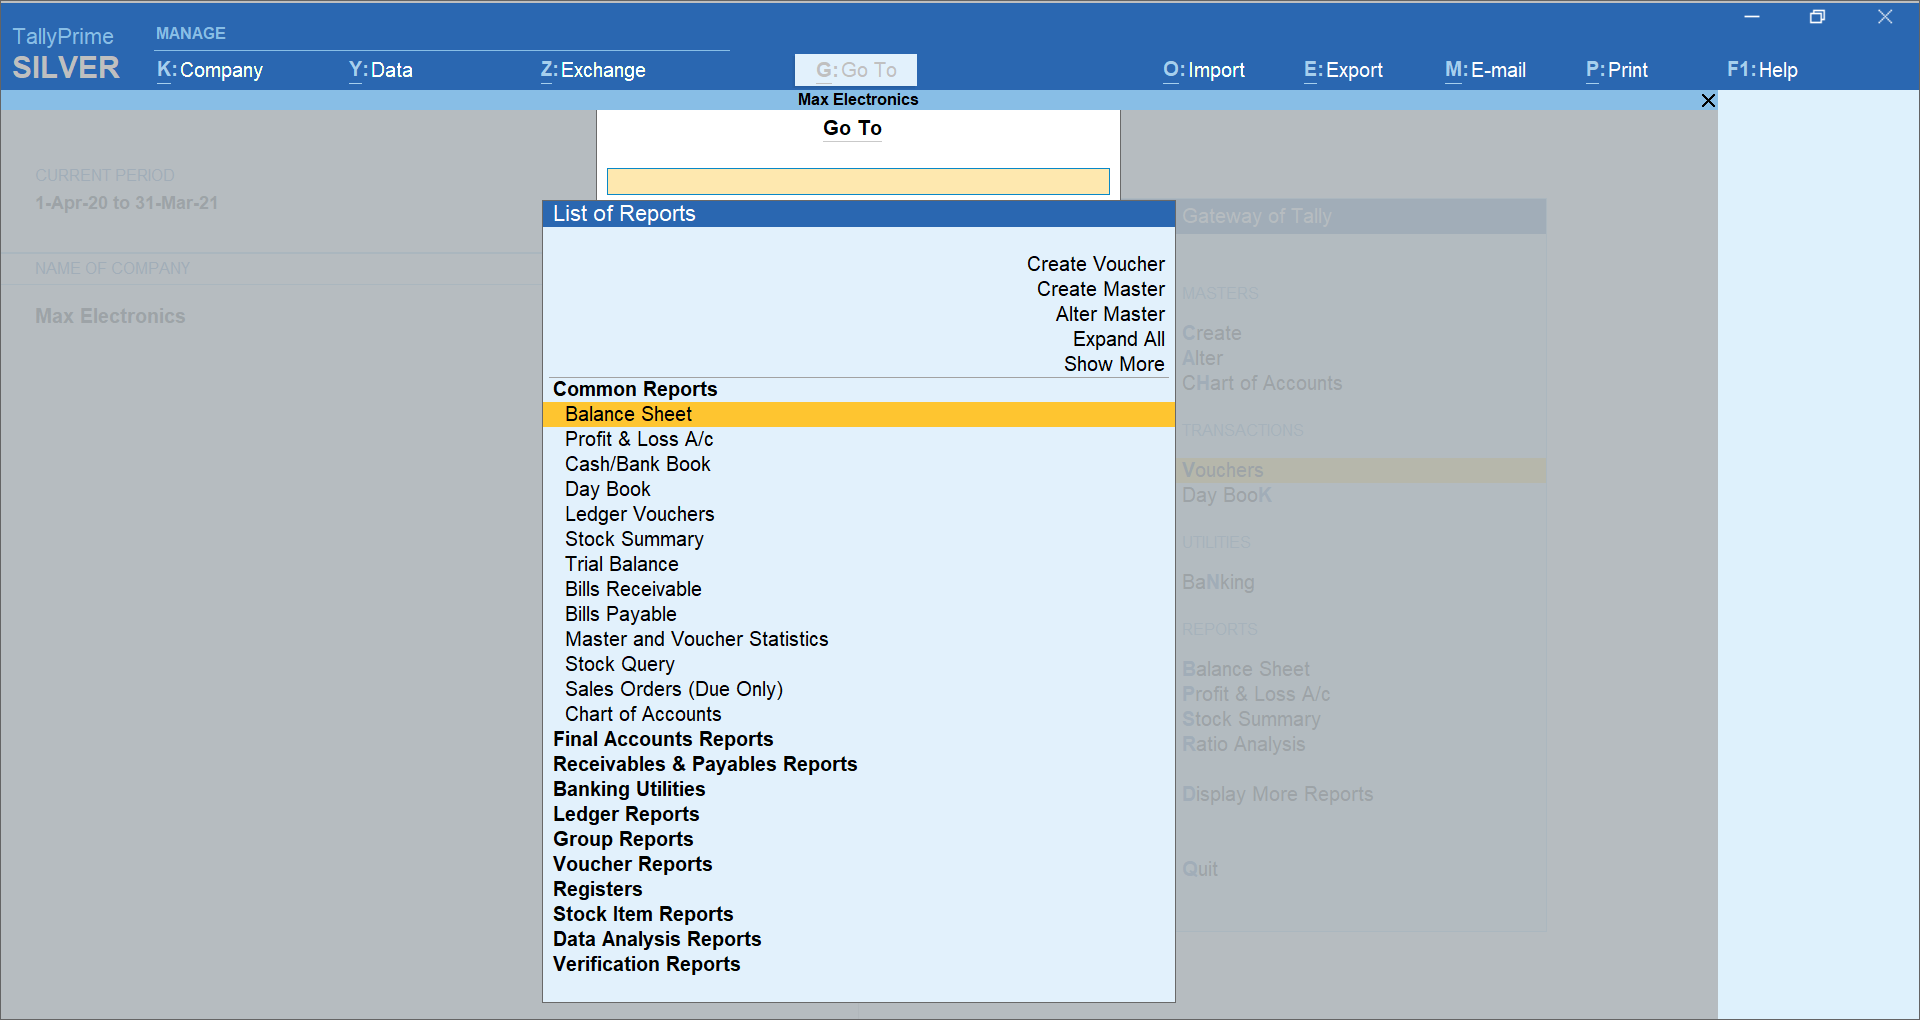
Go To option on the top menu helps you to quickly access any report or feature that you want to use. Any screen that you access using Go To will open on top of the current screen, and closing the screen will take you back to the screen that was open earlier. You can use Alt+G to access Go To. The option Switch To is placed with Go To as a toggle to help you move from the current screen to any other screen. You can use Ctrl+G to access Switch To.


How to Download, Install and Activate TallyPrime

You can start using the TallyPrime features in a matter of minutes. All you need to do is download the setup file, install TallyPrime, and activate the license.

If you are a new user, create a company, and start recording your transactions. You can create all ledgers needed to maintain your accounts while recording transactions. In case you want to try TallyPrime before buying it, or you are a student, you can use the Educational version.

If you are using an earlier version of Tally, upgrade to TallyPrime, and continue your business as usual.


Download and Install TallyPrime

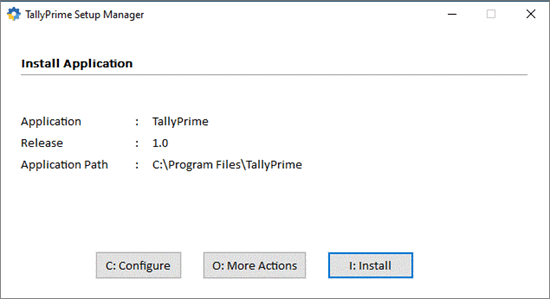
You can download the application setup from Tally Solutions website. After downloading the setup files, install the application on your computer. Installation steps remain the same regardless of the TallyPrime edition you have purchased.

You can install TallyPrime on any computer with 64-bit edition of Microsoft Windows 7 or later.

  1. Download the setup files.
    1. Go to https://tallysolutions.com/download/.
    2. Click Download.
    3. Select the folder where you want to save the setup.exe file.
    4. Click Save.
  2. Install TallyPrime.
    1. Double-click setup.exe.
    2. Double-click Install New.
      Install new TallyPrime
    3. Configure Application Path, if needed.
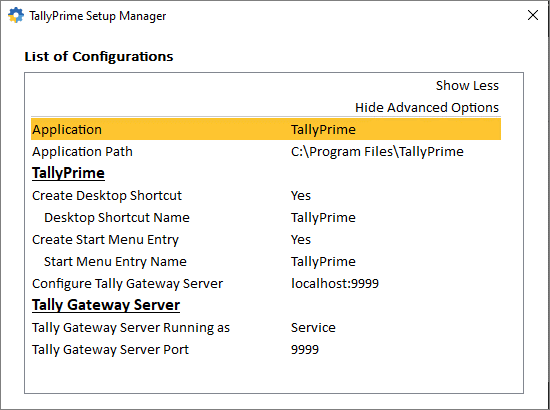
      By default, the application will be installed at C:\Program Files\TallyPrime.

      • Click Configure.
      • Double-click Application Path.
      • Click … and change the path as needed.
        Note: If you are already using Tally.ERP 9, it is recommended that you install TallyPrime in a different folder. This will allow you to use both the products simultaneously, if needed.

        List of configurations for installation of TallyPrime

      • Close the List of Configurations window.
    4. Click Install.
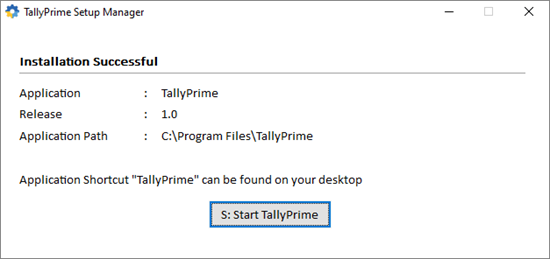
      The application gets installed, and the following window opens.
    5. Click Start TallyPrime to launch TallyPrime.

You can activate the license and start using TallyPrime.

New Users – Activate License

If you have purchased a single user Silver License, you can activate the license on one computer. If you have a multiuser Gold License, you need to activate the license on one computer on the LAN, and configure all other installations using the same license.

Activate New License

  1. Start your TallyPrime. The Welcome to TallyPrime screen appears.
    Activate TallyPrime license
  2. Click Activate New License.
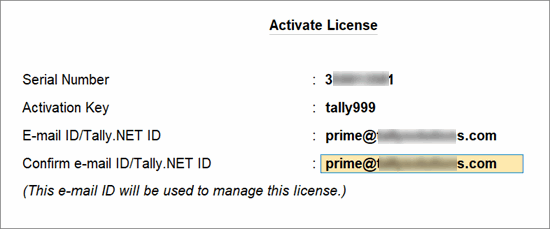
  3. If you have a Single-Site license, enter your Serial Number, Activation Key, and Administrator e-mail ID.Activate TallyPrime license
    Note: The e-mail ID provided here will be linked to your account, and used for all future communication and licensing activities.
  4. Press Enter to proceed. The Unlock License screen appears.
    Unlock TallyPrime license
  5. Enter the Unlock Key sent to your e-mail ID.
    Note: If you have not received the unlock key, press F2 (Get Unlock Key).
  6. Press Enter to unlock your license.
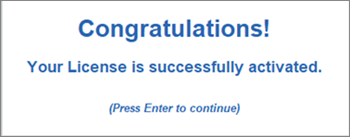
    After your license is unlocked, the following message appears.

After activating the license, you can create your first Company and start using TallyPrime for business transactions.

Depending on the size and scale of your business, you can have different setups.

Try it for free | Educational version

If you want to try TallyPrime before you buy, or just want to learn how to use the product, you can use the Educational version for free. You can try all features in the product, just with the restriction that voucher dates are limited to 1, 2 and 31.

  1. Start your TallyPrime. The Welcome to TallyPrime screen appears.
  2. Click Try It For Free.
    Use Educational mode

You can start using TallyPrime in Educational mode. The window title will be in dark green colour and will show EDU under the product name.

TallyPrime

Tally_Prime

The all-new TallyPrime is a business management software that provides a complete business solution to manage the growing needs of small and medium businesses. Using TallyPrime, you can manage invoicing, accounting, inventories, banking, taxation, payroll and much more. The robust features understand your business needs and simplifies the lives of business owners through simple to use software, insightful reports, multi-task capability and much more.

With a wide range of features, the all-new TallyPrime can be your perfect business companion. Here is the list of TallyPrime’s features:

  • Simplified Interface
  • Insightful Business Reports
  • Invoicing & Accounting
  • GST / Taxation
  • Inventory Management
  • Cash Flow Management
  • Multitasking Capabilities
  • Go To feature
  • Access business data Online
  • Secured Data

Let’s explain some of the key features of TallyPrime.

Top 10 TallyPrime Features

  • Simplified Interface

Getting started with TallyPrime is extremely simple. You can set up the application in less than a minute and get started with invoicing in the even faster

Feature 1: Tally Prime Simple Interface yet powerful & fast

  • Insightful Business Reports

TallyPrime comes with more than 400 business reports which are readily available with powerful insights that will allow you to make informed decisions for the growth of your business. TallyPrime’s amazing flexibility allows you to slice and dice your reports and look at them the way you want, the way it works for your business. At a click of a button, you can change the view, modify the parameters of reports and much more.

Insightful and Powerful Business Report


  • Invoicing & Accounting

TallyPrime makes it amazingly simple to create and record invoices. Optimized invoice components, host of configurations, multiple billing modes and so on.. makes TallyPrime really moulding to your business.  The wide variety of TallyPrime’s features such as multi-currency, price level, sales and purchase management etc. makes it a simple accounting system.

Feature 3: Invoicing & accounting feature in Tally Prime


  • GST/ Taxation

With TallyPrime, you can generate GST compliant invoice in seconds. You can generate different types of GST invoices such as tax invoice, bill of supply etc. automatically. The renowned ‘Prevention – Detection – Correction’ technology of TallyPrime helps you generate and file accurate returns always. Using TallyPrime’s features, you can also manage TDS, TCS and payroll statutory such as PF, ESI and employee income tax.

Feature 4: GST Compliance

  • Inventory Management

The features of TallyPrime’s make it one of the most flexible system for optimal inventory management.  With a wide variety of features in TallyPrime such as godown management, stock valuation, manufacturing, batch and expiry date, job costing etc., and the powerful inventory reports makes inventory management a cakewalk.

Feature 5: Powerful Inventory Management in Tally Prime

  1. Multi-task capability

TallyPrime supports multi-tasking and helps you handle the day-to-day interruptions. You are in the middle of the sales invoice but want to record another new sale? Or in the middle of making a payment entry but want to refer to outstanding report before proceeding? Or want to print another report being in middle voucher entry? Using TallyPrime, you will be able to handle many such situations without the hassle of switching between multiple instances of Tally or the worry of losing your progress

  • Cash Flow Management

By increasing the efficiencies in accounts receivable, accounts payables, inventories, and several other areas of business, TallyPrime helps you optimise cash flows. Using TallyPrime’s features, you can automate and keep a complete track of accounts receivables and payables cycle.  With powerful inventory features such as re-order level and actionable insights such as fast/slow-moving goods, item-wise profitability etc. you can plan your investment and be on top of your cash flow.

Feature 6: Cash Flow Management Like Never Before in Tally Prime

  • Multi-task capabilities

TallyPrime supports multi-tasking and helps you handle the day-to-day interruptions. You are in the middle of the sales invoice but want to record another new sale? Or in the middle of making a payment entry but want to refer to outstanding report before proceeding? Or want to print another report being in middle voucher entry? Using TallyPrime, you will be able to handle many such situations without the hassle of switching between multiple instances of Tally or the worry of losing your progress.

Feature 7: Multi-Tasking Capabilities in Tally Prime

  • Go To feature

With TallyPrime, discovering insights just got easier. This is made possible with TallyPrime’s new and powerful search bar called “Go To”. Using Go To, you can search and find the things you didn’t know Tally could do for you and discover new insights to run your business better.

Feature 8: The most powerful one is “Go To” feature of Tally Prime

  • Access business data Online

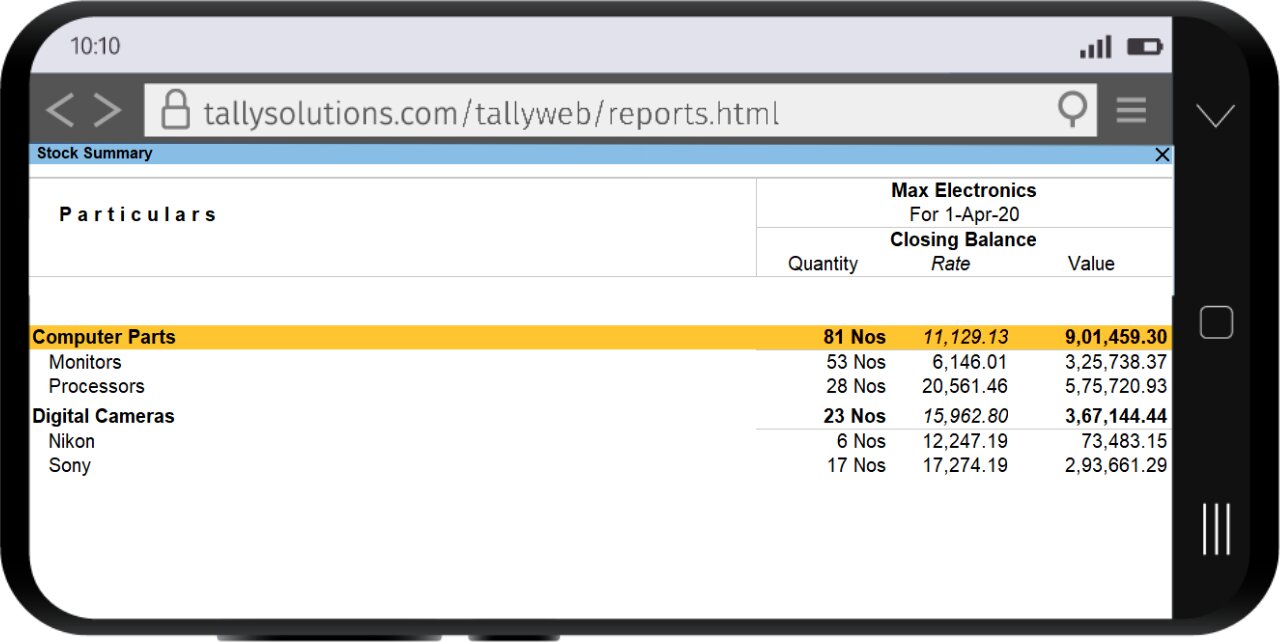
TallyPrime gives you the ability to view business reports online from the comfort of a web browser, wherever you are with the promise that your data will always rest with you.

Feature 9: Access business data online. Anytime, Anywhere

  • Secure data

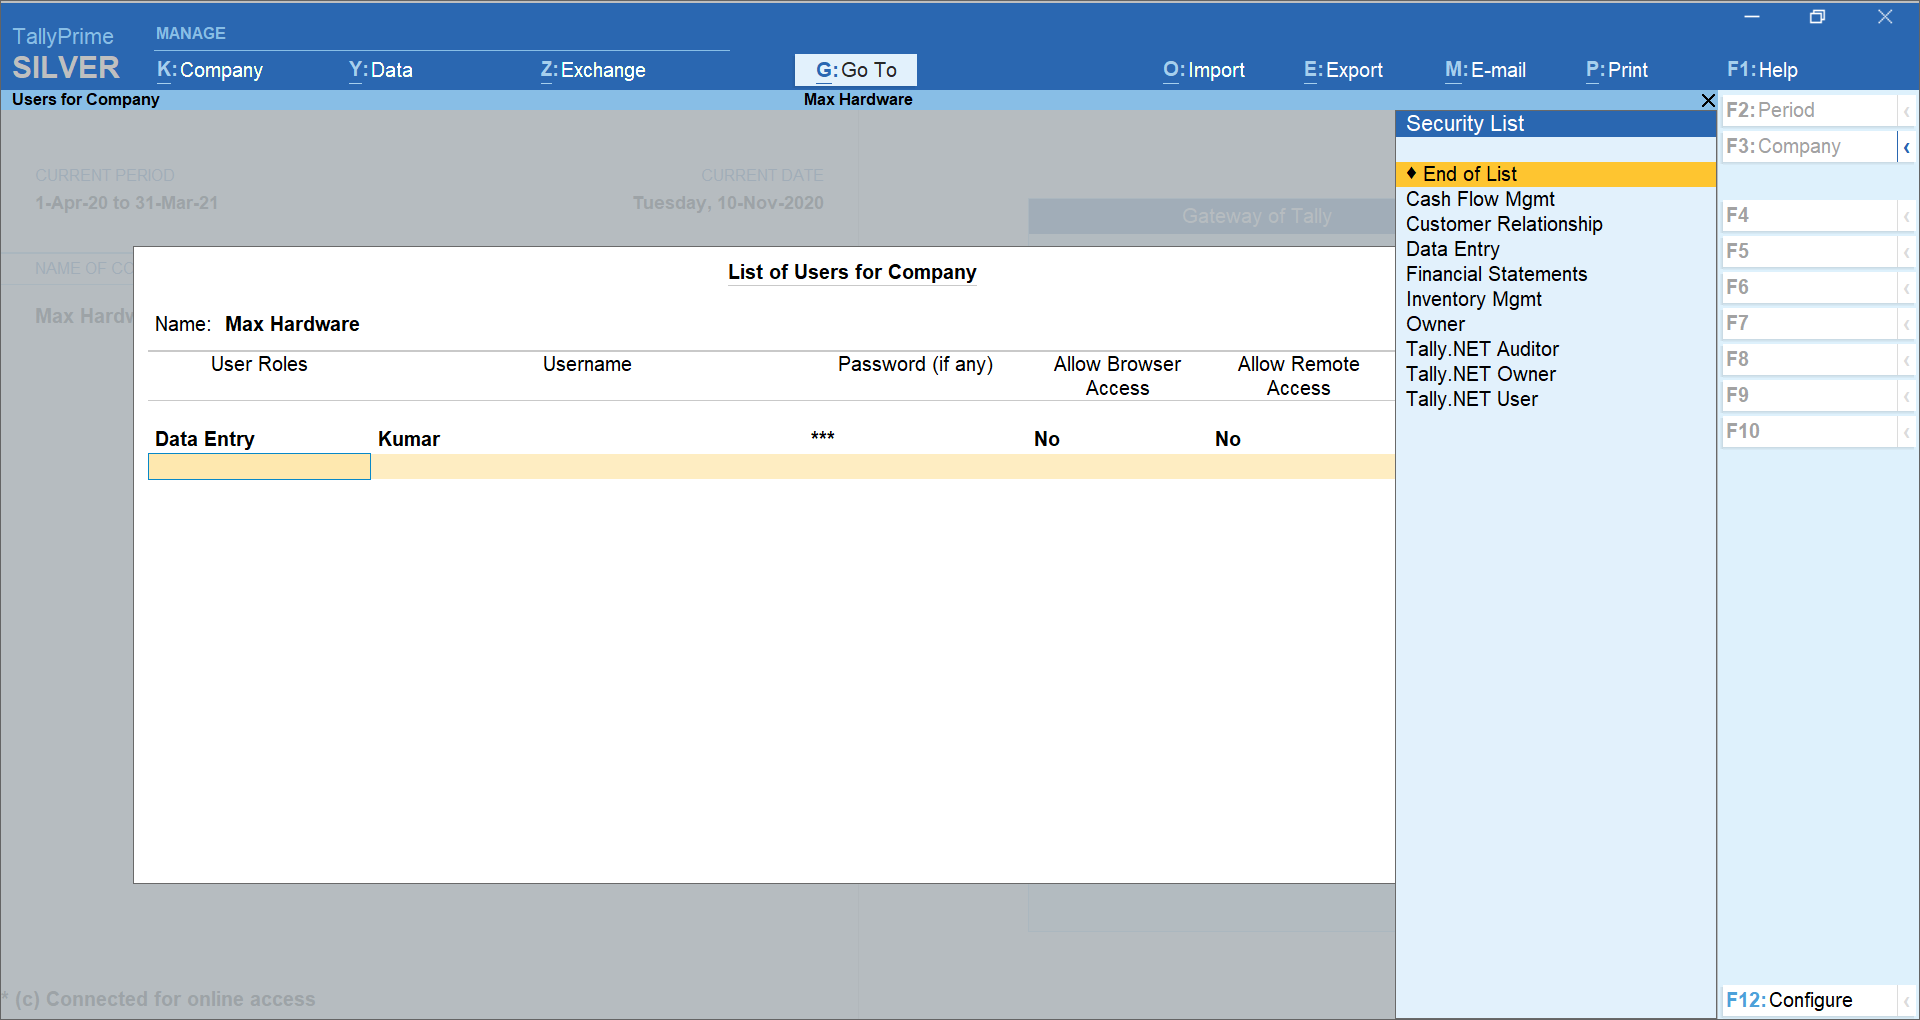
We understand that your business data is sensitive and ensure that you will always remain in custody of it. With multiple user access control and feature-based security, levels ensure that access to your data is restricted based on your choice

Feature 10: Above all your business data is secured and safe in Tally Prime

To summarize, TallyPrime is a comprehensive business management software for small and medium business. By helping you meet your growing business needs, better control over cash flow, optimized inventory management, tax compliance etc. makes TallyPrime the perfect companion for your business. There are several features in TallyPrime which are sure to delight you, most of which would need to be experienced to truly feel their power.

Inventory Control – Definition, Objectives, Methods and Steps

Definition of inventory control

Inventory control is an activity of checking a shop’s stock and to maintain the inventory at desired levels, keeping in view the best economic interest of an organization. In simple words, inventory control is a process of ensuring that a business maintains the adequate quantity of stock to meet the forecasted demand with minimum holding cost.


Why do businesses carry an inventory?

The below table explains different inventory types and the reason why such inventories are held by the business.

Raw materials The reason for holding raw materials is to reap the price advantage available on purchase of bulk or on any seasonal raw materials which can be procured only during the harvest seasons.
Inventory in work-in-progress The reason is to balance the production flow. Let’s say if any batch order which requires the same kind of raw material, it can be diverted from the batch order that has been postponed by the management for certain time thereby not affecting the production flow.
Readymade components A company usually does not produce every component that goes into the product. Sometimes they buy readymade components available in the market. In such a situation, it becomes necessary for the company to hold stock of those readymade inventories which are required in the production of the final product.
Finished goods A company stocks the finished goods during the waiting period until it finds its customer. In some cases, more stocks are held to create demand for the product and get a high price for the product.

From the above, it’s quite clear that for various reason, you need to hold inventories in the business. In this process, how much to stock is an important question that needs to be answered. Here is why inventory control plays an important role.

Importance of inventory control

Managing adequate stock is key for managing inventory successfully. Overstocking will lead to cash flow blockage and the additional cost for managing excess stock. On the other hand, understocking leads to loss of sale due to non-availability of stock at the right time.

As a result, a business needs to implement inventory control so that the right product at the right place and the right time is available.

Inventory control helps the business in knowing the shortfall and quantities to be ordered considering the net stock available. Thus, it ensures that enough stocks are maintained to meet customer needs, at any point in time.

Objectives of inventory control

Inventory control has two key objectives:

Customer service level

Why do you produce goods? The answer is simple it is to sell the goods at a good price. In an open market, there are so many manufactures who may produce the same goods as you may. Then how could you be different and attract customers to your product? The answer here is plain, it’s only through proper customer service.

Customer service means having the right goods available in the right quantity in the right place at the right time. This can only be achieved if you have proper inventory control measures followed up in your organization.

Cost of holding inventories

Another objective of inventory control is to optimize the cost of ordering and carrying inventories. As we know that the overall objective of inventory control is to achieve satisfactory levels of customer service by keeping the inventory costs within reasonable bounds.

Therefore, the cost of ordering inventories and carrying those inventories throughout the production is also important to keep the overall cost of selling as low as possible.

Advantages of inventory control

  • Maintaining an optimum level of inventories
  • Helps in laying the procurement process considering the wait-time, lead-time etc.
  • Periodical inspection of inventories
  • Guides us on storing and issuance of inventories from godowns.
  • A systematic record of movement of materials.
  • It helps to lay out plans for physical verification of inventories.

Steps involved in inventory control

Step 1: Deciding on the minimum levels of inventories

A production department is incomplete if it does not have a good relationship with the sales and marketing department. It is because the demand or need for the product you produce can only be assessed by people who are close to customers such as sales and marketing.

Thereby deciding on the levels of inventory i.e. maximum-minimum limits of inventory is important because as a manufacturer you would not like the raw materials to go obsolete even before the production has begun or to stock up raw materials that have very limited use in the production of a finished product.

Step 2: To decide on the re-order level

The demand for anything is uncertain in this world. Especially with customers taste and preferences. A product manufactured by you may be selling high and you must be ready to decide as how much to produce adhering to customers demand.

For which you have to decide as to when you will be re-stocking the raw materials which will be used in the production of the final product. If the restocking time passes beyond the committed time of the finished product to the customer, then you will not be able to deliver a complete product to the customer.

Step 3: Choosing a sound inventory control method

There are several types of inventory control method available and you can choose the one which suits your business. No matter which method you choose, it is important that the techniques should assist knowing the minimum quantity of stock, point in time at which the stock should be re-ordered and right quantity that should be ordered.

Inventory Control Methods

The following are the different types of inventory control methods used by the business.

ABC analysis

Here, the stock is divided into three sections namely A, B and C. A section consist of inventories that are high in value with low sales frequency or consumption. This category of stocks requires to be controlled closely. Category B consists of stocks that are of moderate value and with decent sales frequency. In category C, you have inventories with low value having high sales frequency requiring minimum inventory control.

Just in time (JIT)

Here, the company maintains an inventory level that is required during production. Under this method, you will not be having any excess inventory beyond the production requirements and it helps you get rid of the cost involved in storing excess stock.  Here, the order of stock is placed when old stock is close to zero and this puts production in risk, even if there are small delays.

Economic order quantity (EOQ)

In this method, the company will get to know how much quantity of inventory should the company order at any point of time and when should they place the order considering the minimum level of inventory.

Fast, slow, and non-moving (FSN)

Here, the inventories are classified based on the movement. All the inventories are categorized as fast-moving, slow-moving, and non-moving. Basis the movement across the categories, the order is placed.

Conclusion

Inventory is money sitting around in another form. You paid money for your inventory, and you will get that money back when you sell it. Until you sell them, you need to hold and manage inventories. Gone are those days where managing inventory was a nightmare. This is because the businesses have started using inventory management software which comes with in-built and automated inventory control techniques.

Basis the consumption of the inventories, the inventory management software is smart enough to know the net stock, shortfall, and quantity of stock to be ordered. More importantly, information is available readily at a click which allows the businesses to take timely decisions.

Payment Declaration Form – GST PMT – 08: Definition, Format and Rules

What is Form GST PMT-08?

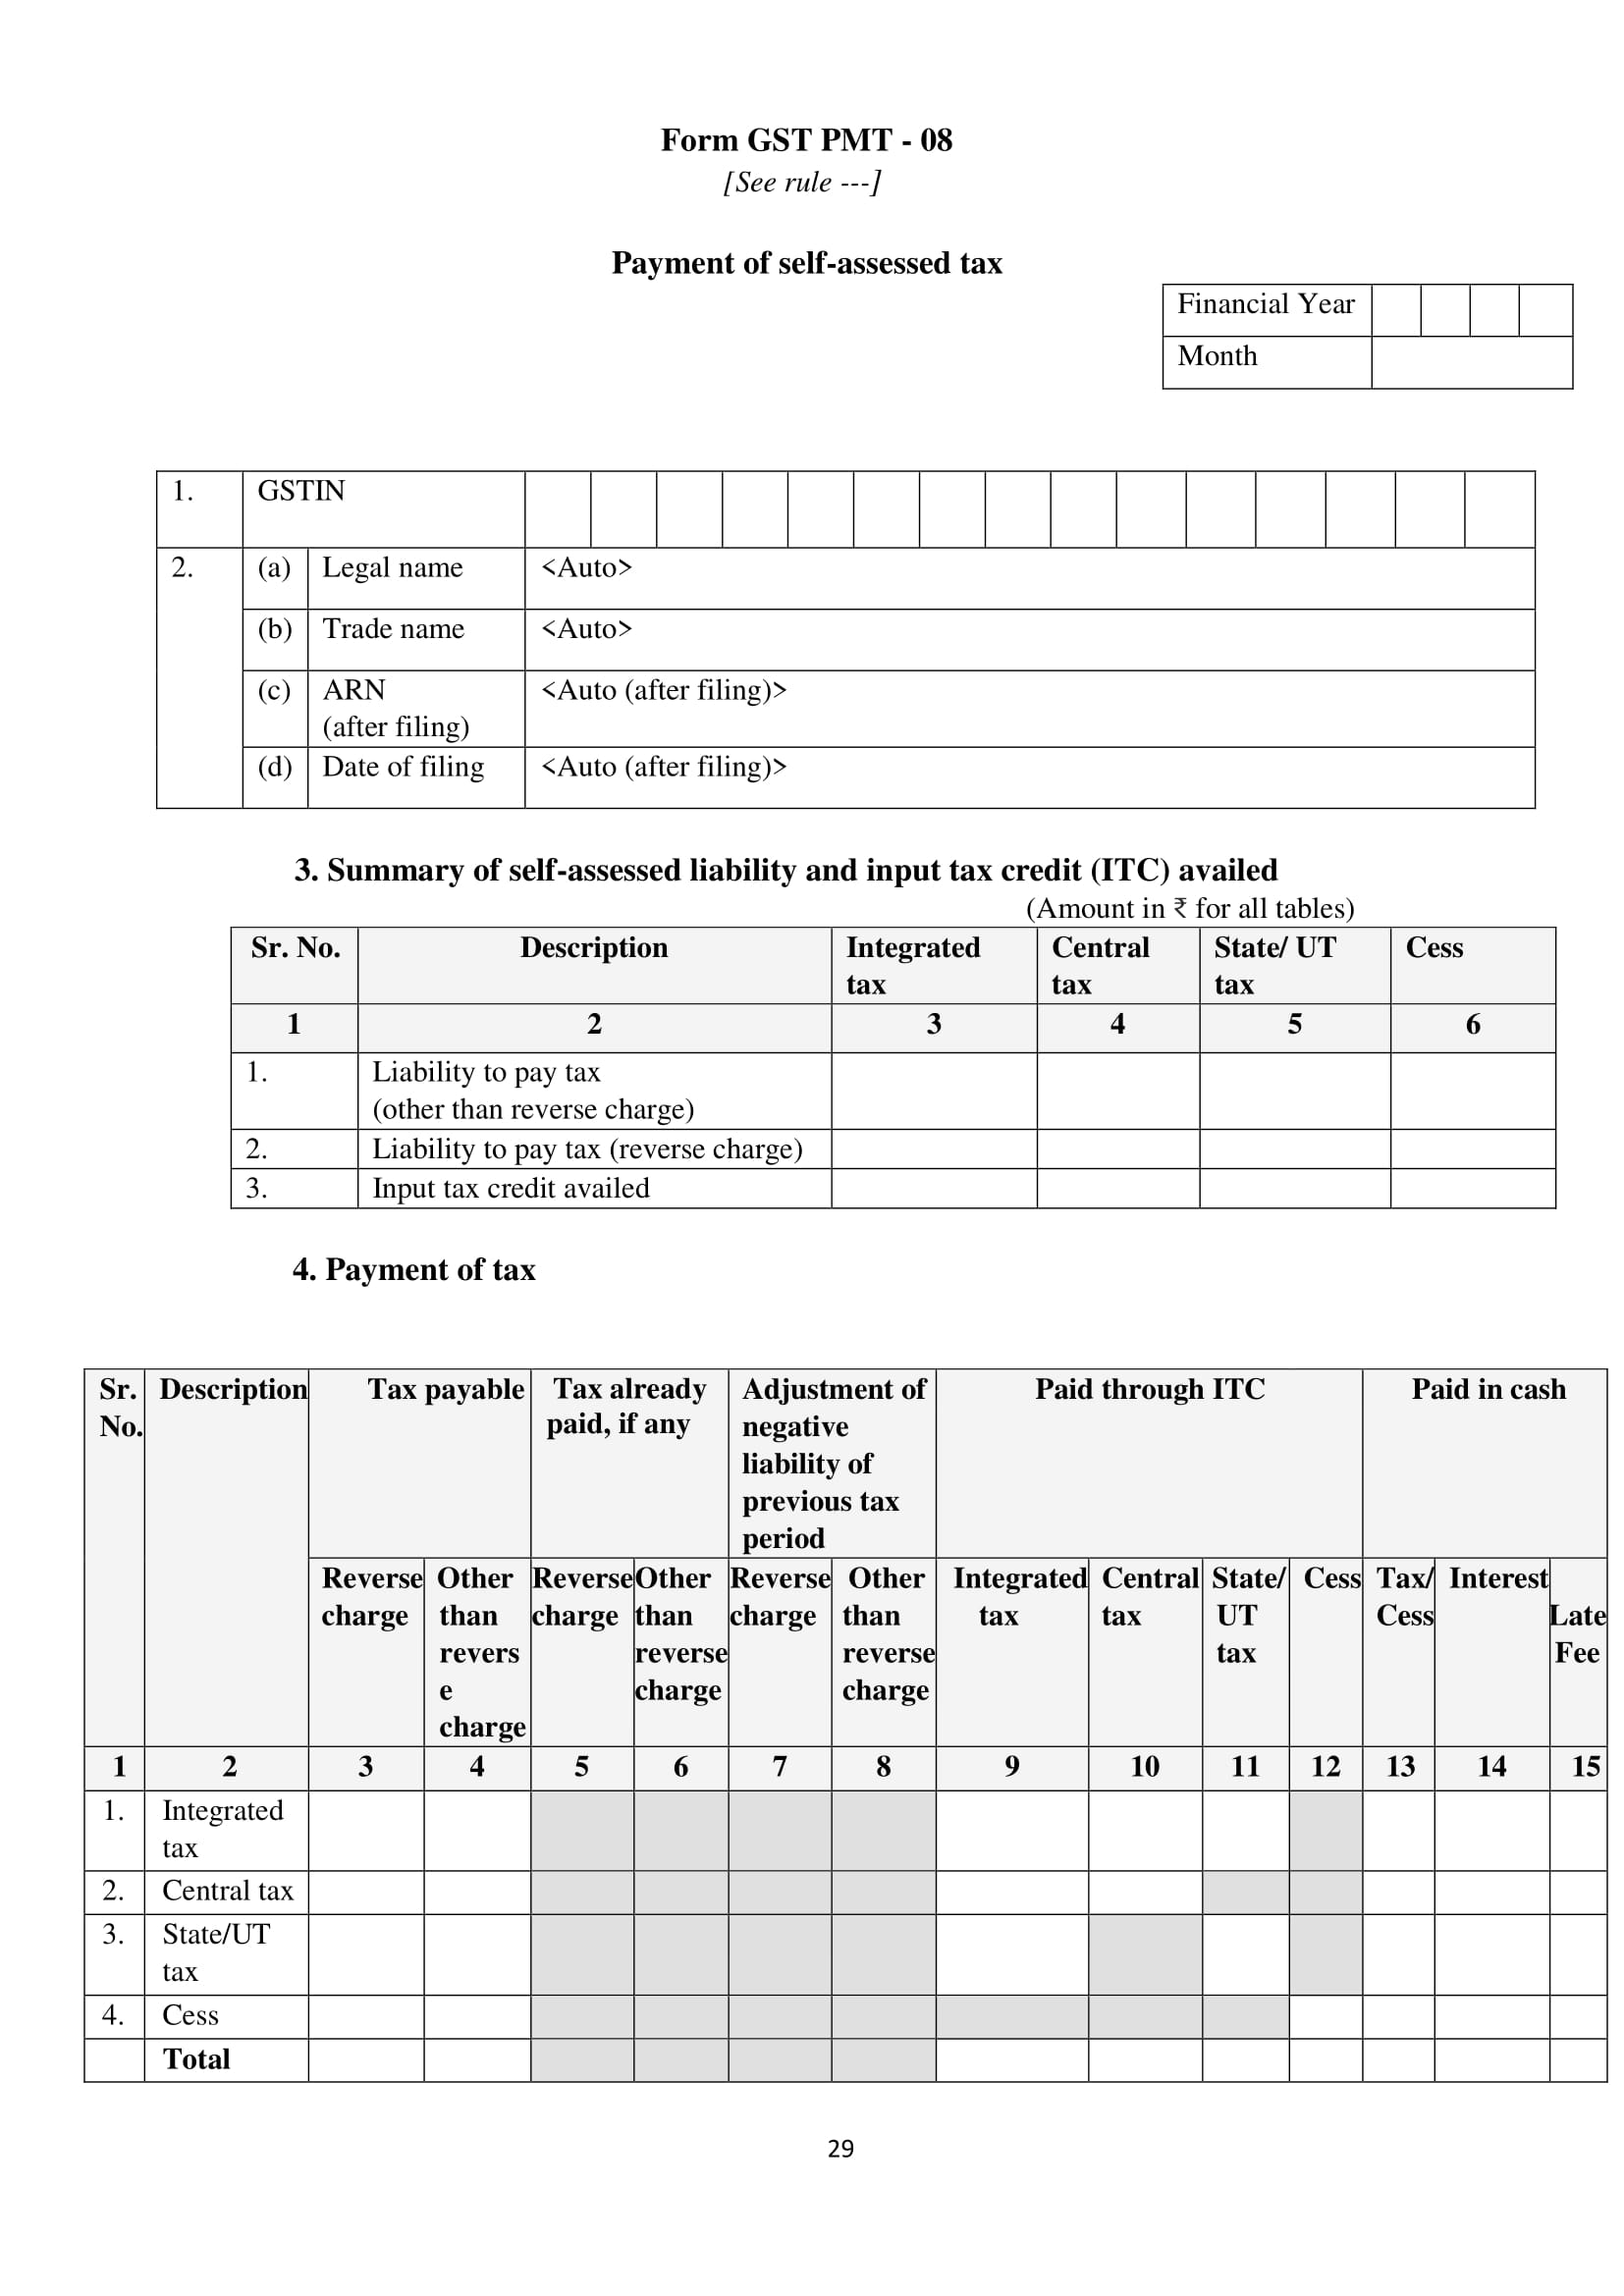
The Form PMT-08 is used to make payment of self-assessed tax by all quarterly taxpayers under the new GST returns system. This form shall be used in the first two months of the quarter. It is used for declaring and paying the tax liability and claiming the eligible input tax credit. It is to be used by 20th of the next month (for the first two months of the quarter). It will be followed by the filing of RET-1/2/3 by the 25th of the month following the quarter.

Since the taxpayer pays the monthly tax liability through this form, such a form is a replacement for the current form GSTR – 3B. Thus, GST PMT – 08 is used to declare and pay the tax liability and claim eligible input tax credit. Furthermore, the taxpayer must make the payment of self-assessed liabilities through GST PMT – 08 by the 20th of the month succeeding the month for which tax is to be paid. Once the payment is made, the taxpayer needs to file GST RET – 1, GST – RET 2 or GST RET – 3 by the 25th of the month following the quarter to which such a return pertains.

Format of GST PMT-08

Form GST PMT-08 Format

Key things to keep in mind while filing GST PMT-08

  • PMT-08 form applies to all returns i.e., SAHAJ, SUGAM, and Normal returns (quarterly filing only)
  • A taxpayer who opts to do return filing on a quarterly basis needs to make a payment on a monthly basis depending on the supplies initiated within the month
  • With the help of this form, only eligible ITC can be claimed
  • Self-assessed liabilities will be paid for the initial two months of the quarter for quarterly filers and these amounts shall be populated to RET-1
  • The credit of the tax paid within the initial two months of the quarter will be available at the time of return filing for the quarter
  • Self-assessed liabilities will be paid within the 20th of every month
    Liability can either be settled out of the balance in the electronic cash ledger or electronic credit ledger, whichever is applicable
  • Tax liability and input tax credit (ITC) availed will be based on self-assessment subject to the adjustment made in the main return of the quarter
  • According to Section 50 of the Act, excess ITC claimed/short liability declared will be liable for interest charges. Hence, any late payment will draw interest as per the rate mentioned in Section 50 of the Act
  • Also, the declaration in this form needs to be filed even if no supplies were initiated during the month

What is Form GST Anx-2 under New GST Return?

Under the New GST Return System, there will be one main return called the FORM GST RET-1 and two annexures i.e. FORM GST ANX-1 and FORM GST ANX-2. The return will have to be filed on a monthly basis, except for small taxpayers (taxpayers with a turnover up to Rs 5 crore) who can opt for the quarterly filing of returns.

What is FORM GST ANX-2?

FORM GST ANX-2 is an annexure to the main return FORM GST RET-1, and will have all the details of inward supplies, for the recipient of supplies to take action by either accepting or rejecting these documents, or marking them as pending, for action to be taken later. If the recipient accepts these documents, it means that the supplies reported in such documents by the suppliers in FORM GST ANX-1 are correct.

What are the contents of FORM GST ANX-2?

GSTIN: A taxpayer needs to input the GSTIN.

Basis details: Basic details such as trade name, legal name, etc. will be auto-populated on the basis of the GSTIN.

Inward supplies received from a registered person (other than the supplies attracting reverse charge), imports and supplies received from SEZ units / developers on Bill of Entry: The details will be entered as follows-


Table No. Name of the Table Instructions
3A Supplies received from registered persons including services received from SEZ units The details in these tables will be auto-populated from the following tables of the supplier’s FORM GST ANX-1 return:

3B – Supplies made to registered persons

3E –  Supplies to SEZ units/developers with payment of tax

3F – Supplies to SEZ units/developers without payment of tax

3G – Deemed exports

The recipient has the option to take action on the documents by either accepting, rejecting or marking them as pending.

3B Import of goods from SEZ units/developers on Bill of Entry
3C Import of goods from overseas on Bill of Entry
4 Summary of the input tax credit This will be the total figure of input tax credit for the return filing period, based on action taken by the recipient of supplies such as:

Total credit on all documents that have been rejected

Total credit on all documents that are kept pending

Total credit on all documents that have been accepted

5 ISD credits received This table is for reporting eligible input tax credit that has been received from an input service distributor. This needs to be entered document-wise.

What is the format of FORM GST ANX-2?

FORM GST ANX-2 Format

Key things for taxpayers to keep in mind while filing GST ANX-2

  • The supplier can upload documents continuously and on a real-time basis in FORM GST ANX-1 and will be auto-populated in this annexure i.e. FORM GST ANX-2
  • The details of the documents uploaded by the supplier shall be available for the recipient in FORM GST ANX-2 to take action such as to accept, reject or to keep the document pending
  • If a document is accepted by a recipient, it means that the document has been received before the recipient has filed his return and that the details reported by the supplier are correct
  • Any corrections in the rejected documents can be made only by the supplier through his FORM GST ANX-1
  • If a recipient marks a document as pending, this means he has deferred his action on the said document for a later date, of either accepting or rejecting the document. Input tax credit on these documents will not reflect in the main return i.e. FORM GST RET-1
  • The supplier cannot amend pending invoices until they are rejected by the recipient
  • The status of whether the supplier’s return is filed or not will be made known to the recipient in his FORM GST ANX-2. However, this does not affect the eligibility of the input tax credit available to the recipient, which will be decided as per the Act along with the rules made thereunder
  • A separate functionality will be available to search for and reject an accepted document, on which credit has already been availed. This credit will be shown under reversal in table 4B(1) of FORM GST RET-1, which can be adjusted in table 4A(11) of the same return, in order to arrive at the amount of input tax credit that has been availed
  • FORM GST ANX-2 will be deemed filed based upon the filing of the main return i.e. FORM GST RET-1 relating to the particular tax period
  • If documents have been uploaded by a supplier in his FORM GST ANX-1, but he has not filed his return for the previous two consecutive periods, then the recipient will not be able to take credit on these documents even if the same is made available to him in his FORM GST ANX-2. However, the option will be available to reject or keep these documents pending. For suppliers who file their returns quarterly instead of monthly, then the term ‘two consecutive periods’ are replaced by ‘one quarter’